Framed diorama – Mos Pelgo, part 1
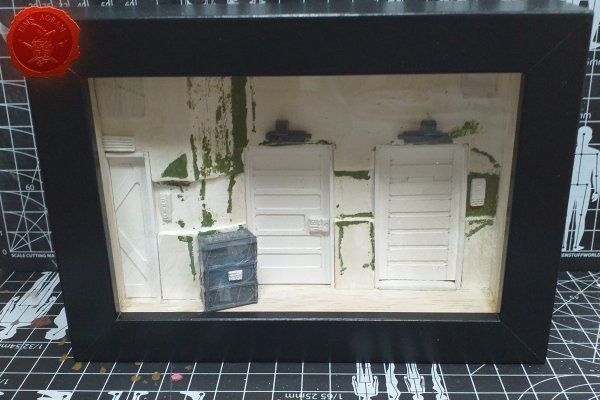
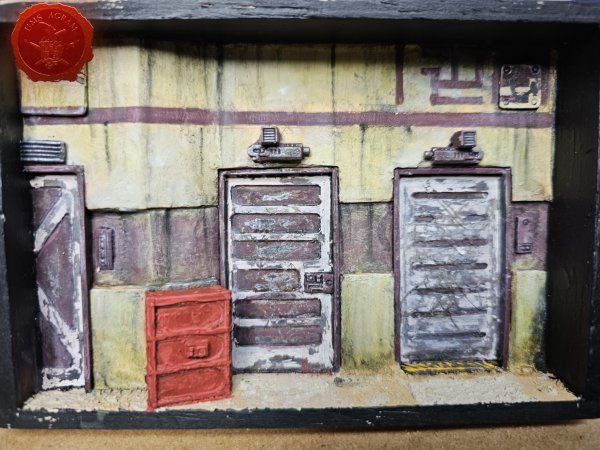
During the weekend, 20-21.5.2023, we held a new weekend diorama making workshop called Vignette in a Frame. Over the course of two days, participants created a staged representation of a haustor/entrance of their own choice from about 10 offered designs, both historical and fantasy/SF themed. The subject of the workshop was the creation of a diorama with elements of stone, wood, metal, concrete/plaster. They placed a representation of the entrance to a building in a frame with internal dimensions of 10 x 15 cm. As part of this workshop, this SW base was assembled, which took almost two years to find its purpose. In the next two articles, we will describe how we painted it and how we painted the characters we placed on it.
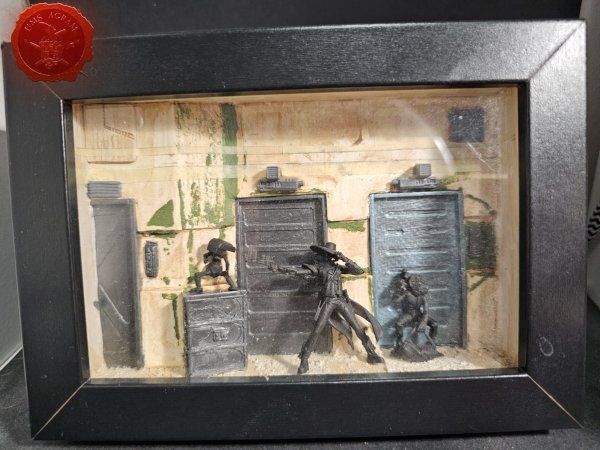
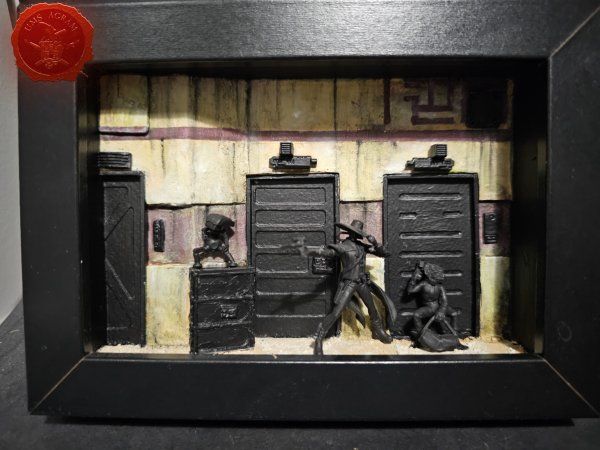
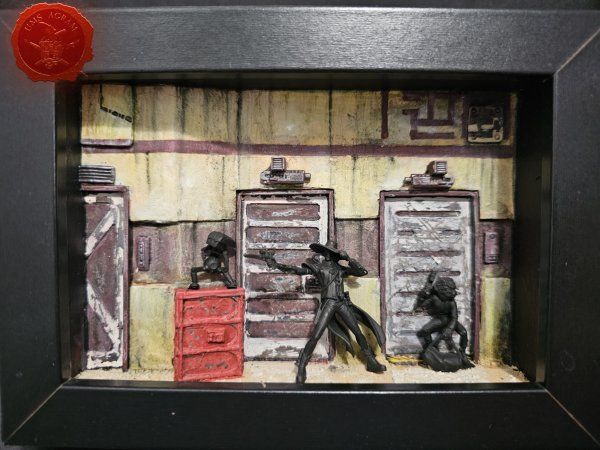
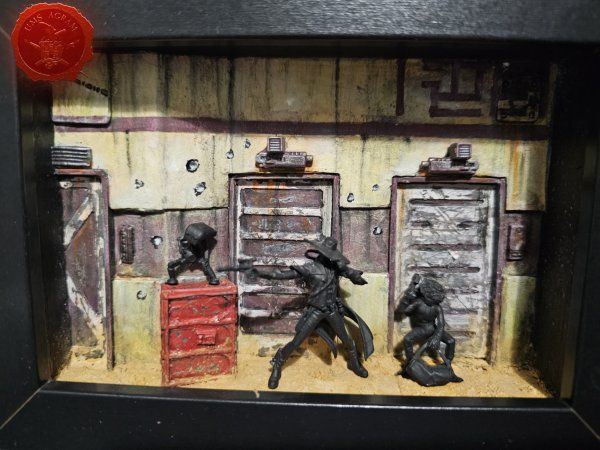
The work at this stage was probably completed in the spring of 2023. In early 2025, I got an idea of what to do next. I decided on characters from the SW world – Cad Bane and his henchmen. The figures are from the game Shatterpoint and seemed to me to be just the right scale for this base.
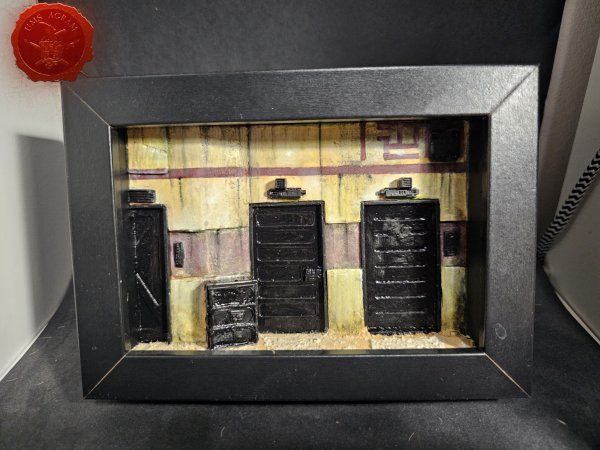
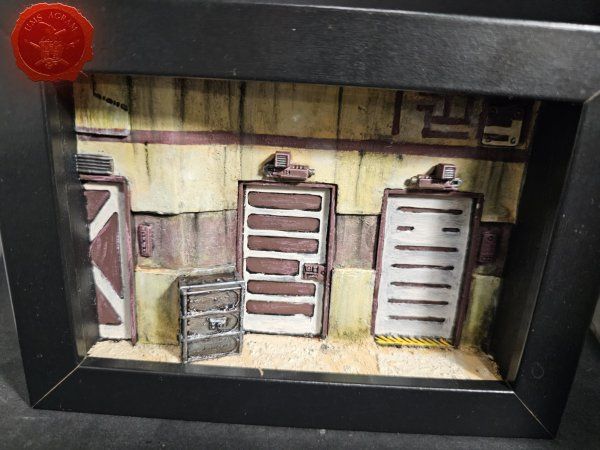
I used masking tape to cover the parts of the facade that will be of a different color and created a two-tone scheme for the facade. I did the initial weathering with acrylics with a light application of dry paint.
Then came the addition of oil effects. I modulated the tone of the facade with beige, yellow and white oil. And I added the leak effects with olive green and black oil (oilbrusher).
To check, I looked at how the scene with the figures looked (I painted all the metal parts of the base black).
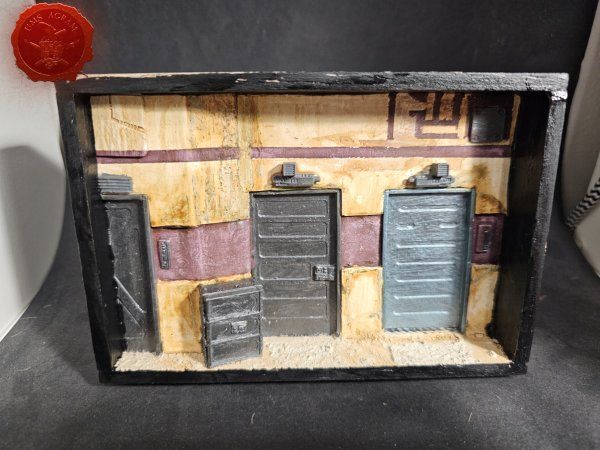
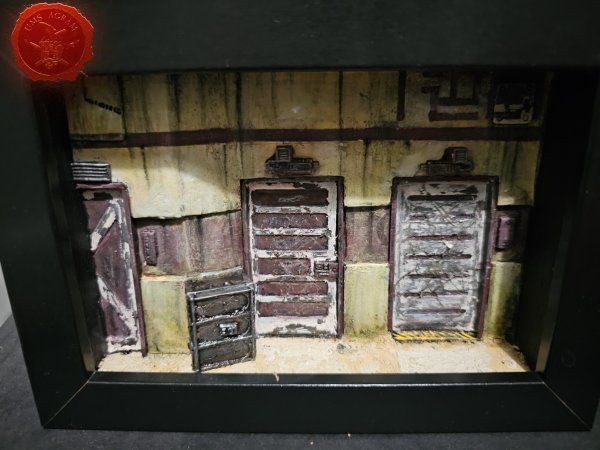
Satisfied with the result, I started painting the metal parts. I painted the bottom layer in several shades of silver tones. Then I added black and red-brown acrylic wash. And when everything was dry, I covered everything with Heavy Chipping and Scratches effect.
Once the effect had dried, I applied the base colors that the metal surfaces were painted in (beige and rotten cherry). After about 15 minutes of drying, I activated the chipping and scratches effects with water and got the desired result.
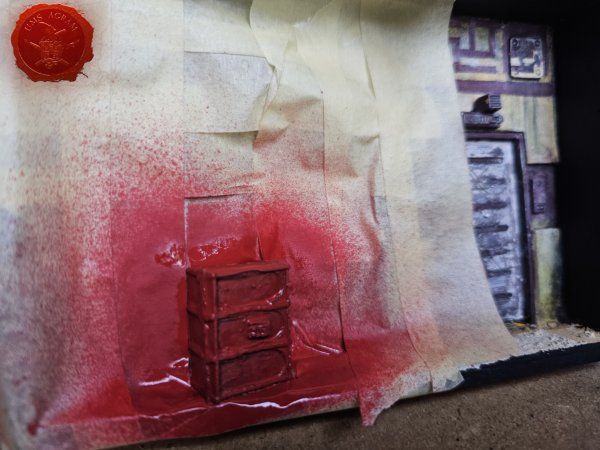
To finish the metal parts, it was necessary to paint the crate. I decided to use red spray paint, so I first "isolated" everything with masking tape. After drying, I repeated the process of activating the effects.
The last job before starting to paint the characters was adding rust to the metal parts and adding blaster holes to the facade. The rust was again done with oils – orange and dark red, in places by brushing, and in places to get a leaky effect. The blaster holes were drilled with a hobby knife and painted black and then beige. And finally I stained the floor and lower parts of the building beige, desert pigments.
Latest articles
- SFRJ 1986 v2 Diorama part 5 Marko Paunović, 19th January 2026
- SFRJ 1986 v2 Diorama part 4 Marko Paunović, 19th January 2026
- SFRJ 1986 v2 Diorama part 3 Marko Paunović, 19th January 2026
- SFRJ 1986 v2 Diorama part 2 Marko Paunović, 19th January 2026
- SFRJ 1986 v2 Diorama part 1 Marko Paunović, 19th January 2026
Latest battle-reports
- Kill Team - Blooded vs. Vespid Stingwings 28th February 2025, GW - Warhammer 40.000, and Antoni Pastuović (Imperial Guard)
- 22nd April 2022, GW - Warhammer 40.000, Borna Pleše (Space Marines) and Kristijan Kliska (Tau Empire)
- 17th November 2021, GW - Warhammer 40.000, and Nino Marasović (Space Marines)

