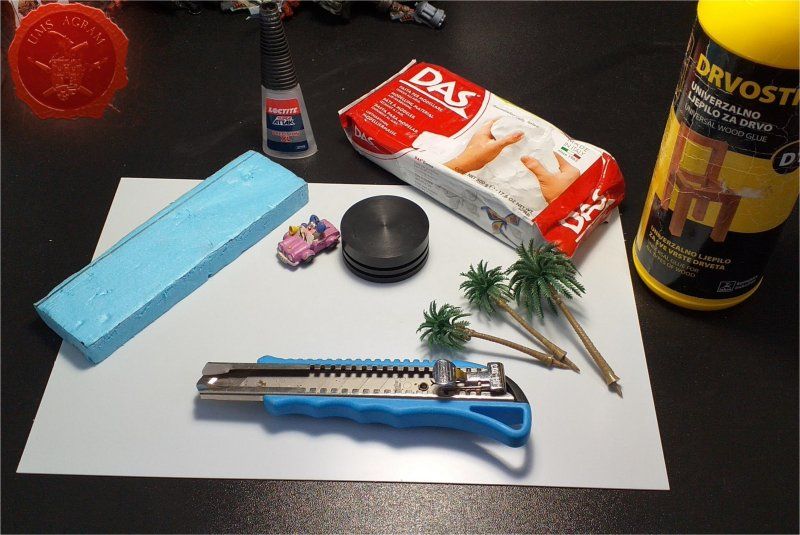
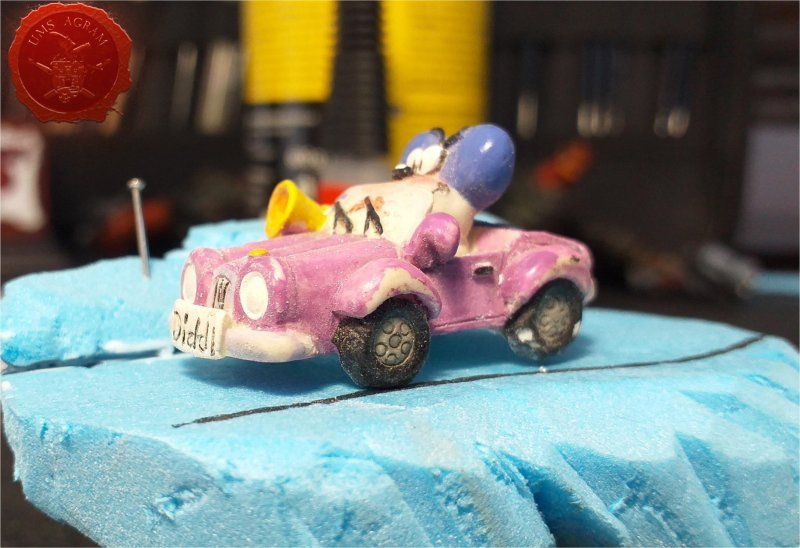
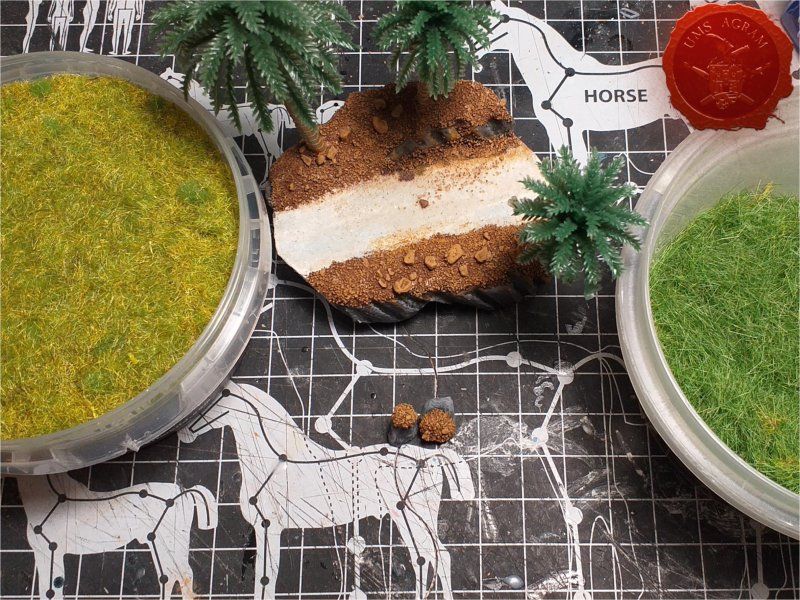
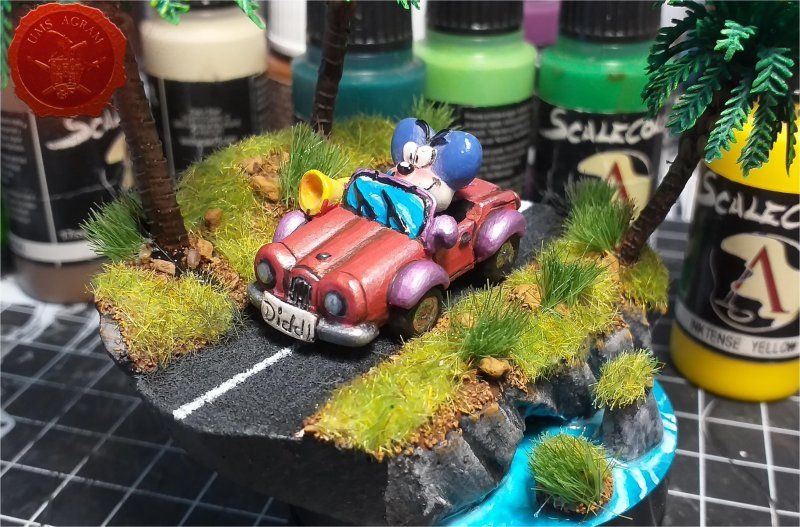
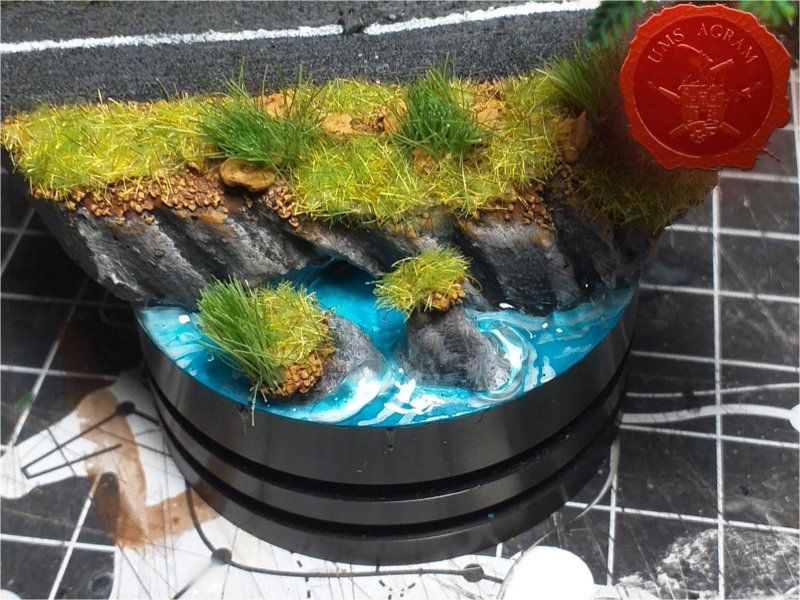
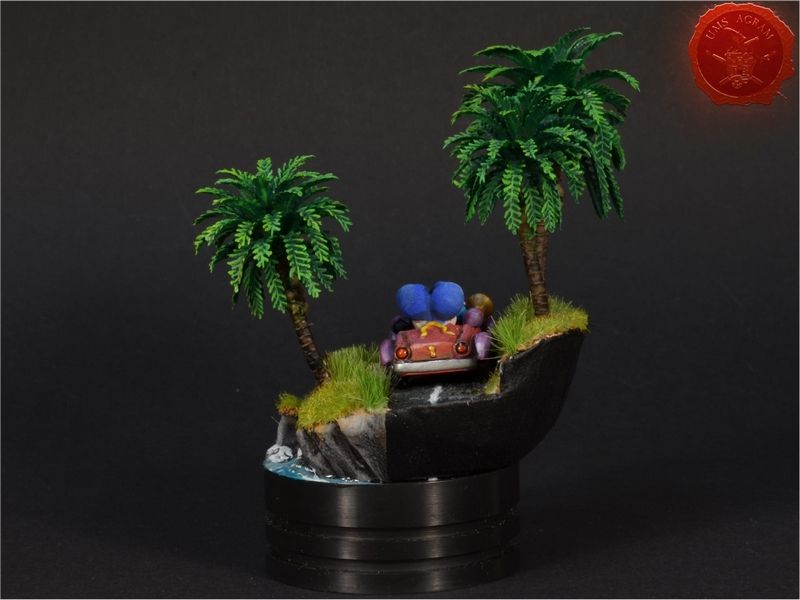
In this article, I will describe making a diorama for probably the silliest figure I’ve done in recent years - a Diddl mouse driving a car. I will use HD styrofoam, plaster, sand (two granulations), PVA glue, pins and palm trees. As for the tools, there will be drills (pin vice and mini electric Proxxon), scalpel, pliers, candle. So let's go…
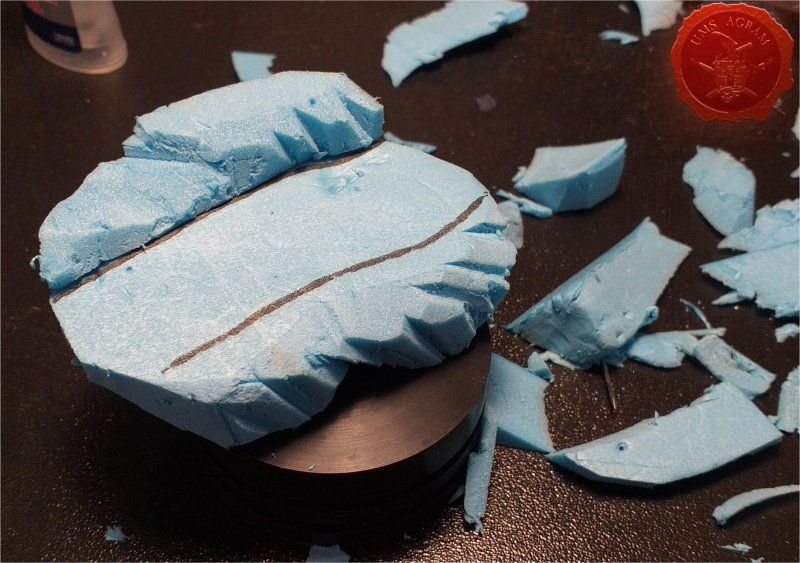
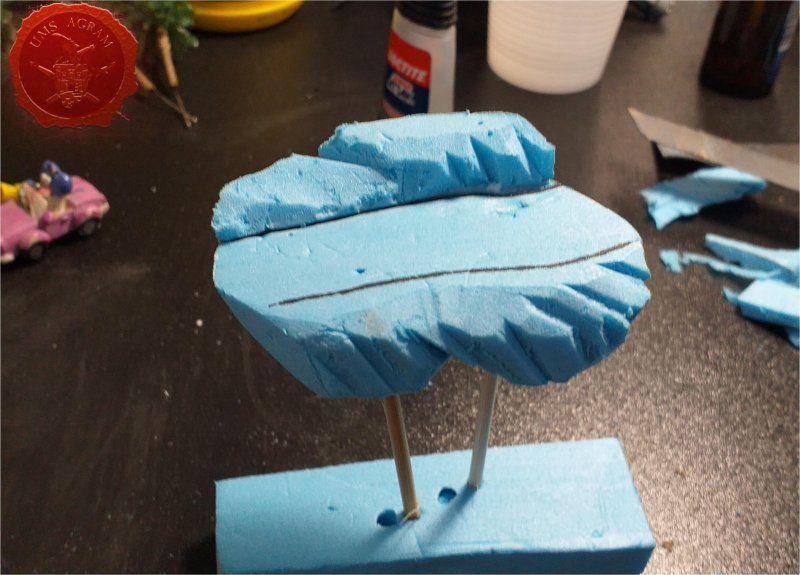
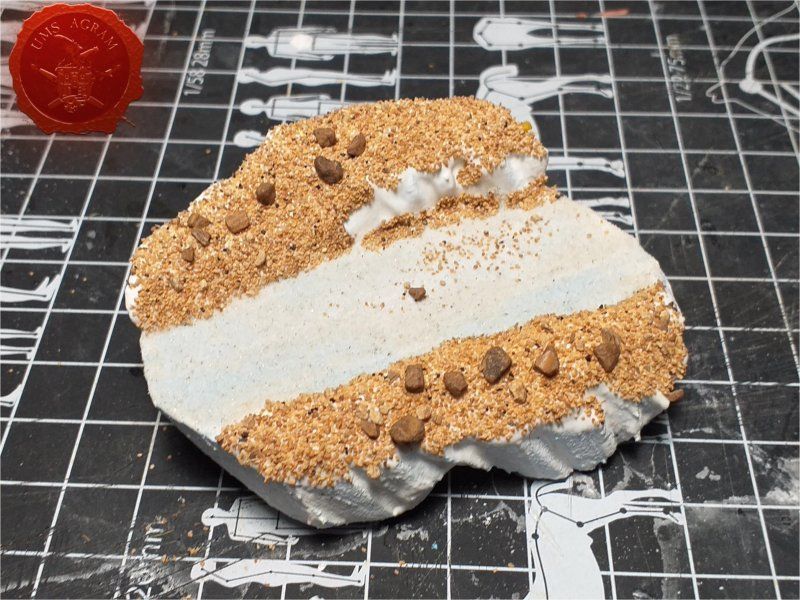
I made the base on two levels from HD styrofoam. I carefully cut it with a scalpel and carved the texture of the rock.
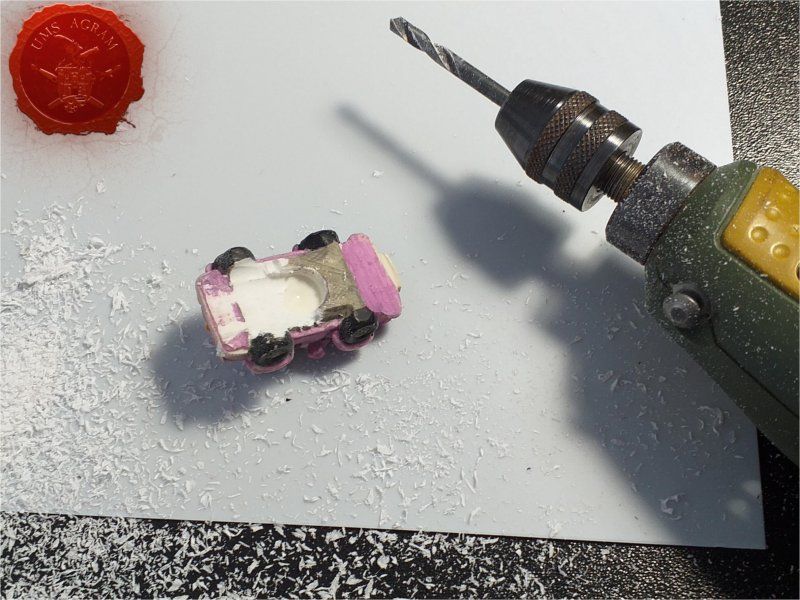
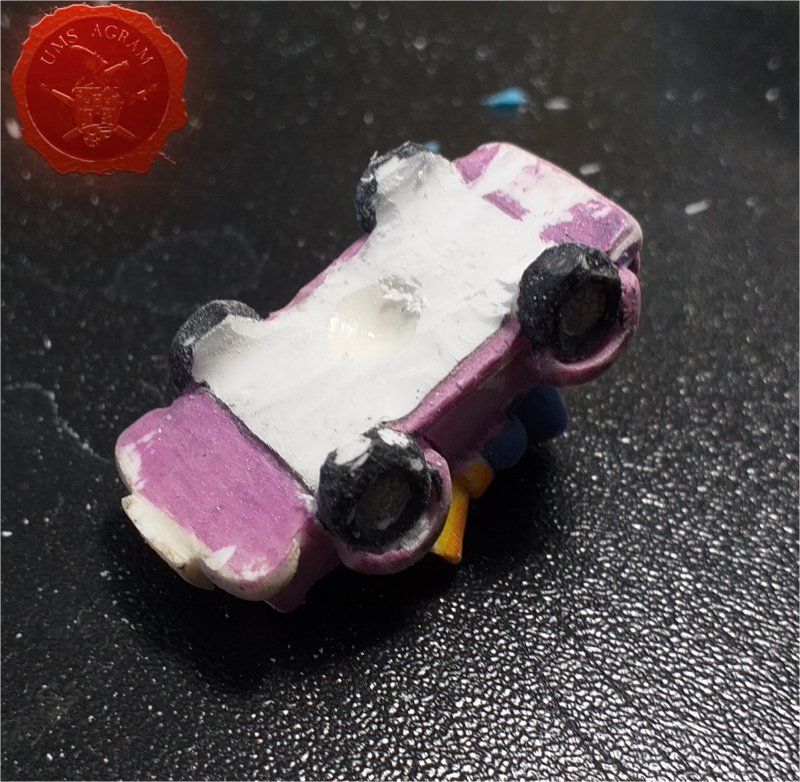
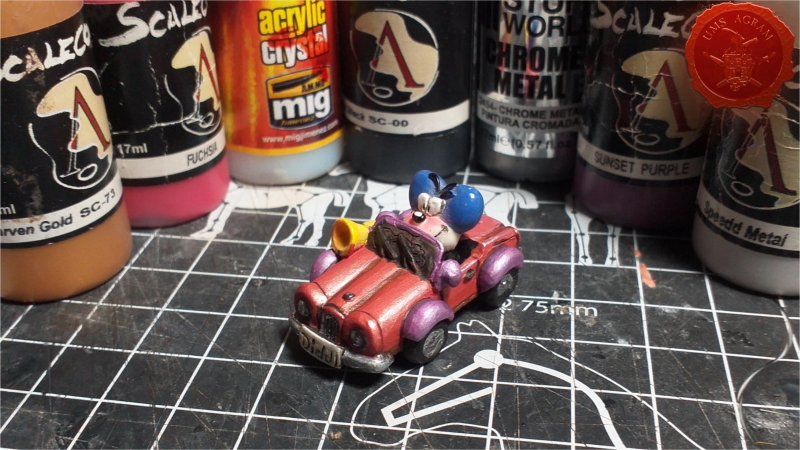
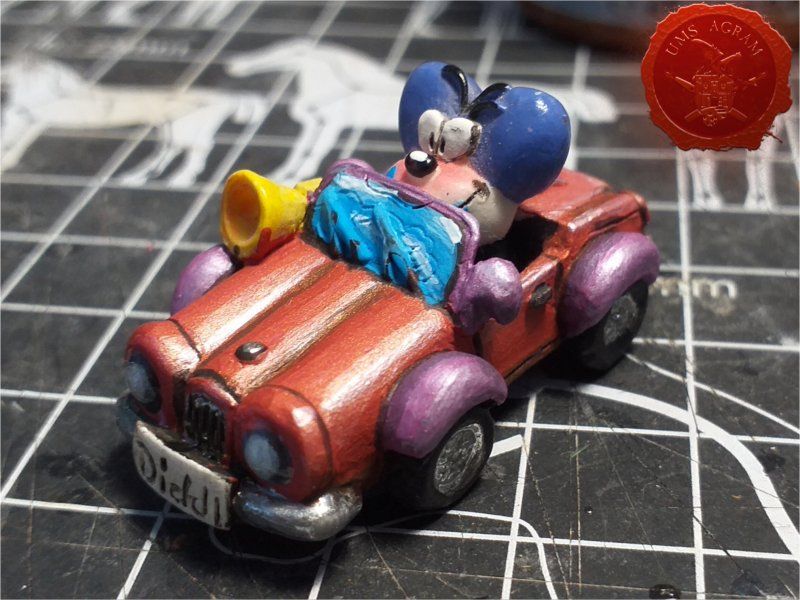
The miniature of Diddl in the car is actually a pencil extension and between the wheels it had some bump with a pencil hole. I didn’t like that part and it actually prevented the placement of the car on the base so I decided to remove it. I decided that the fastest way would be to use Proxxon drill with a mill. Unfortunately, I didn’t find an adequate mill bit so I used a regular 3mm drill bit. It served its purpose.
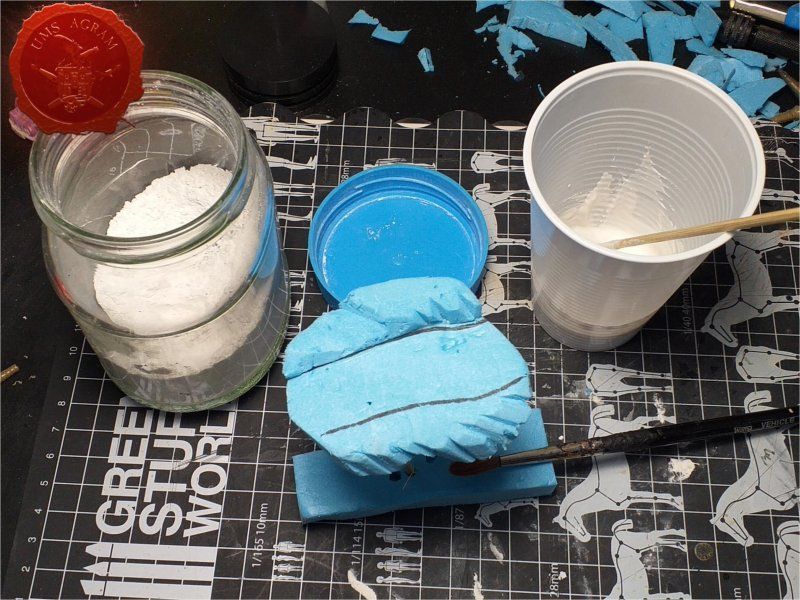
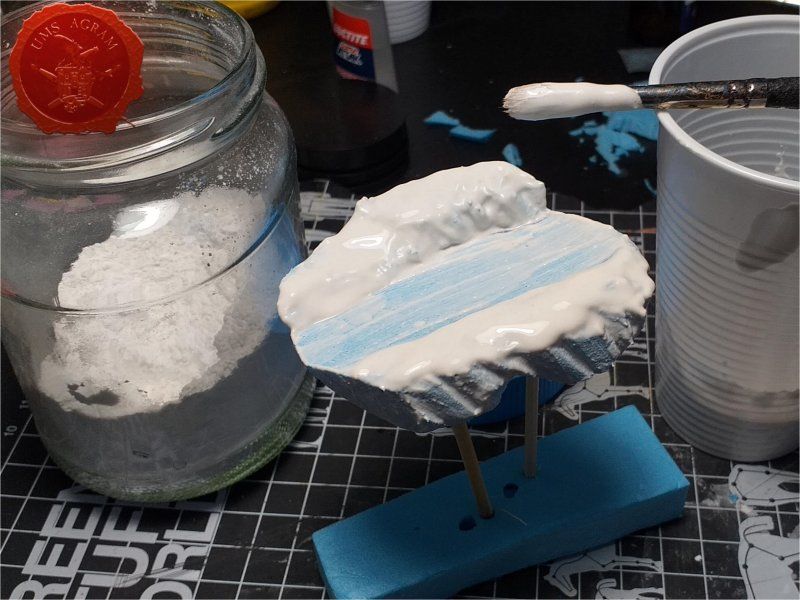
To give the HD styrofoam strength, I decided to cover the entire volume of the base with plaster. I mixed a little into the cup and coated the base with a brush. To keep from flowing and potentially sticking the base to the table, I pinned the base to a makeshift skewer stand and the rest of the styrofoam.
The texture is added next. Here I decided to leave the stone parts / rocks without texture, that is, to leave the plaster texture. In addition, there are two other areas - road and "terrain". I covered the road with the finest sand (chinchilla sand), and I covered the "terrain" with GW textured sand. I glued both sands with PVA glue.
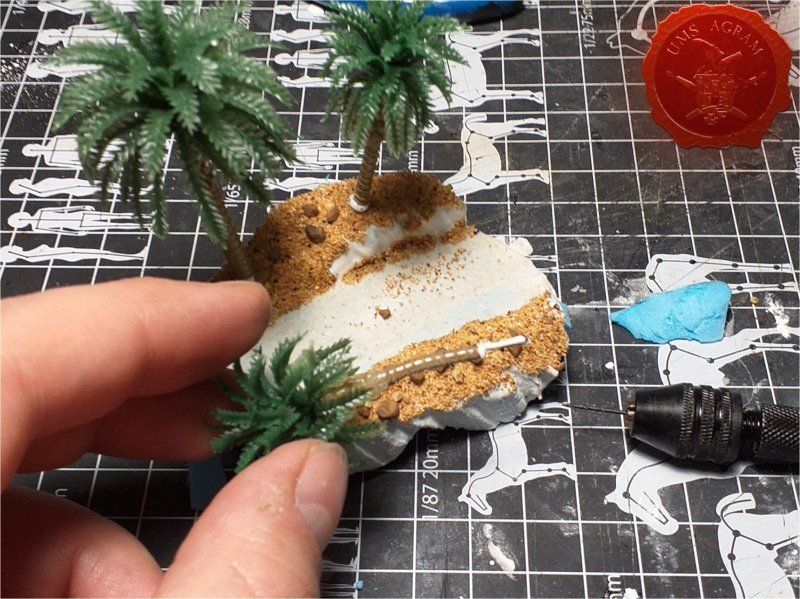
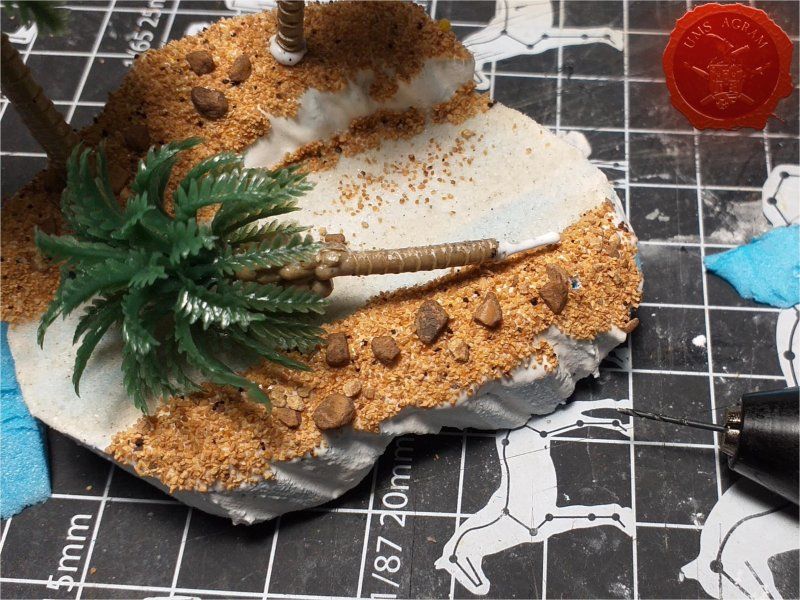
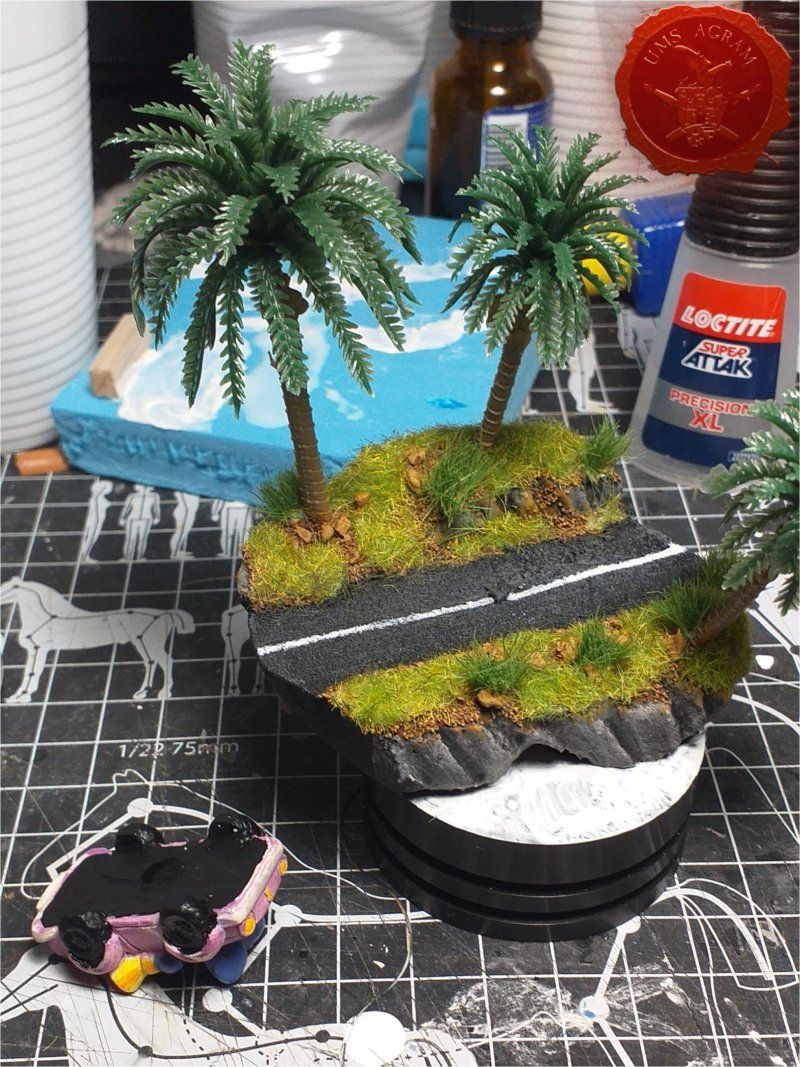
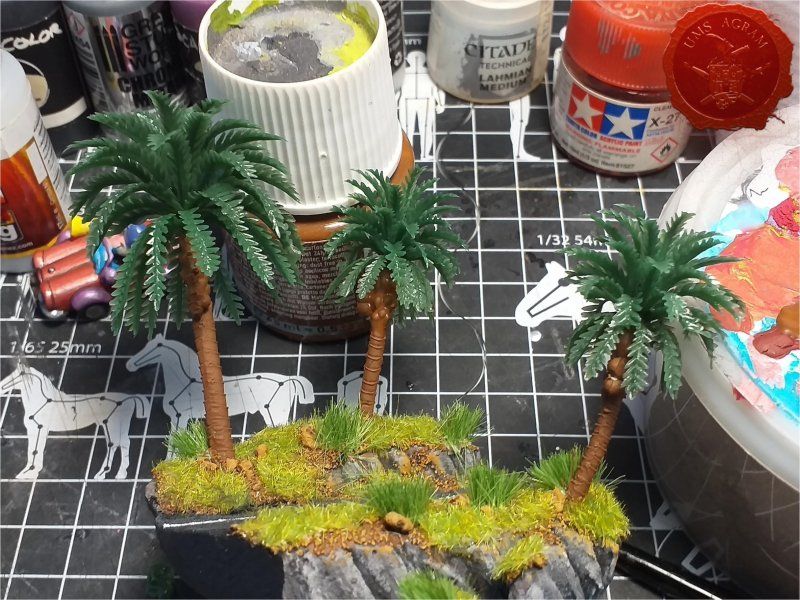
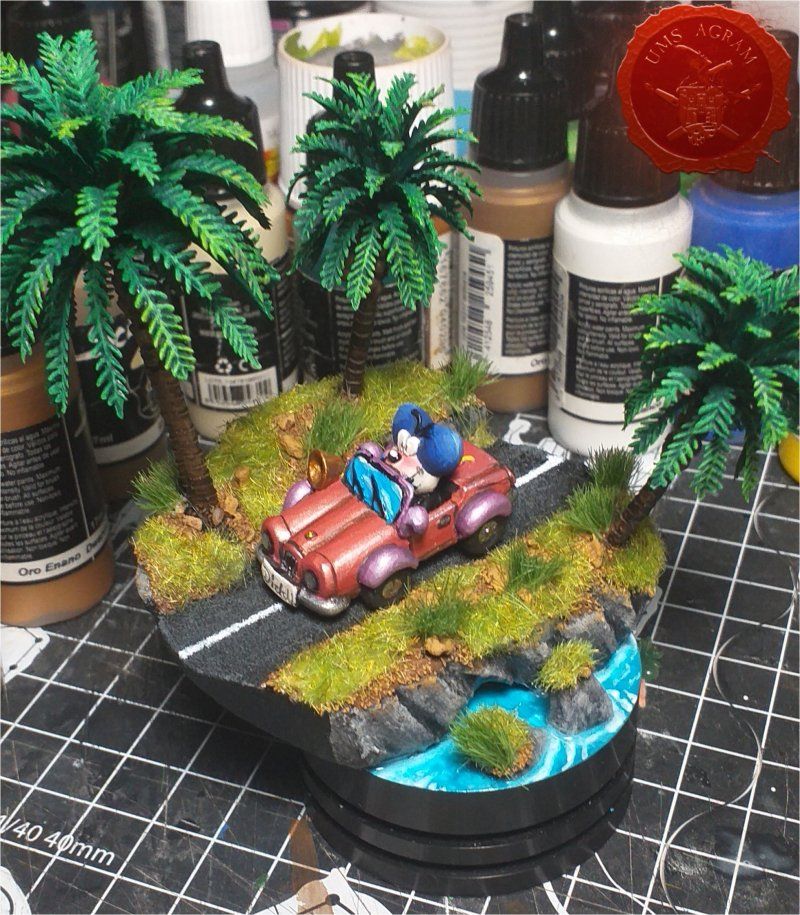
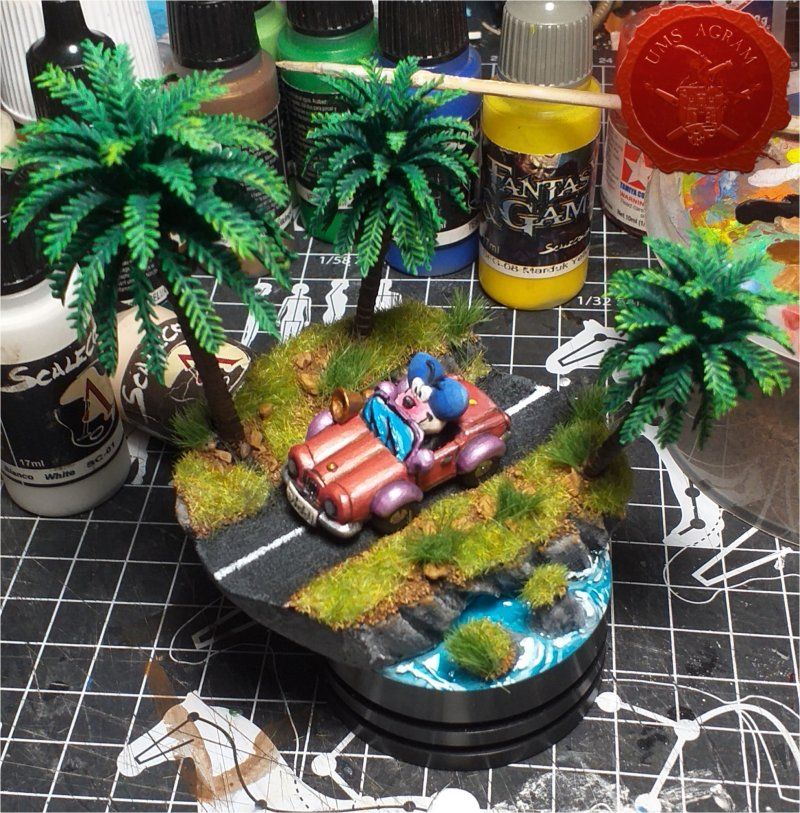
Now it was time to plant palm trees. In order for the joint to be as strong and strong as possible, it is necessary to pin the trees. The simplest way to pin plastic trees is to heat the pin. As it enters the plastic, so it cools and when it cools, the connection it makes with the plastic tree is hard and durable. Then use a drill (in this case, a pin vice) to drill holes in the base for the pin. Then immerse the pin protruding from the tree into the PVA glue and push it into the designed hole.
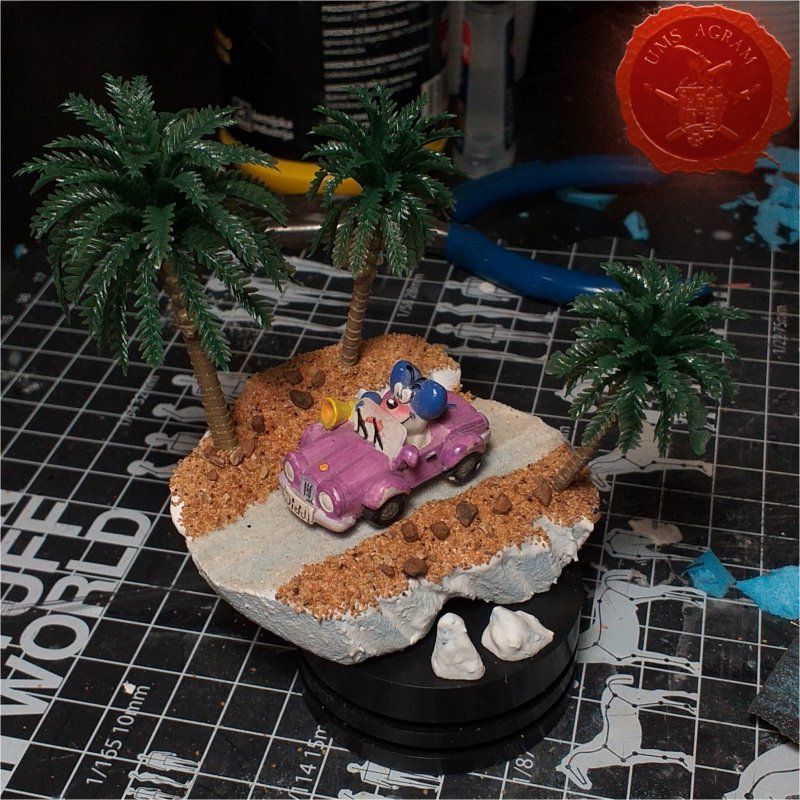
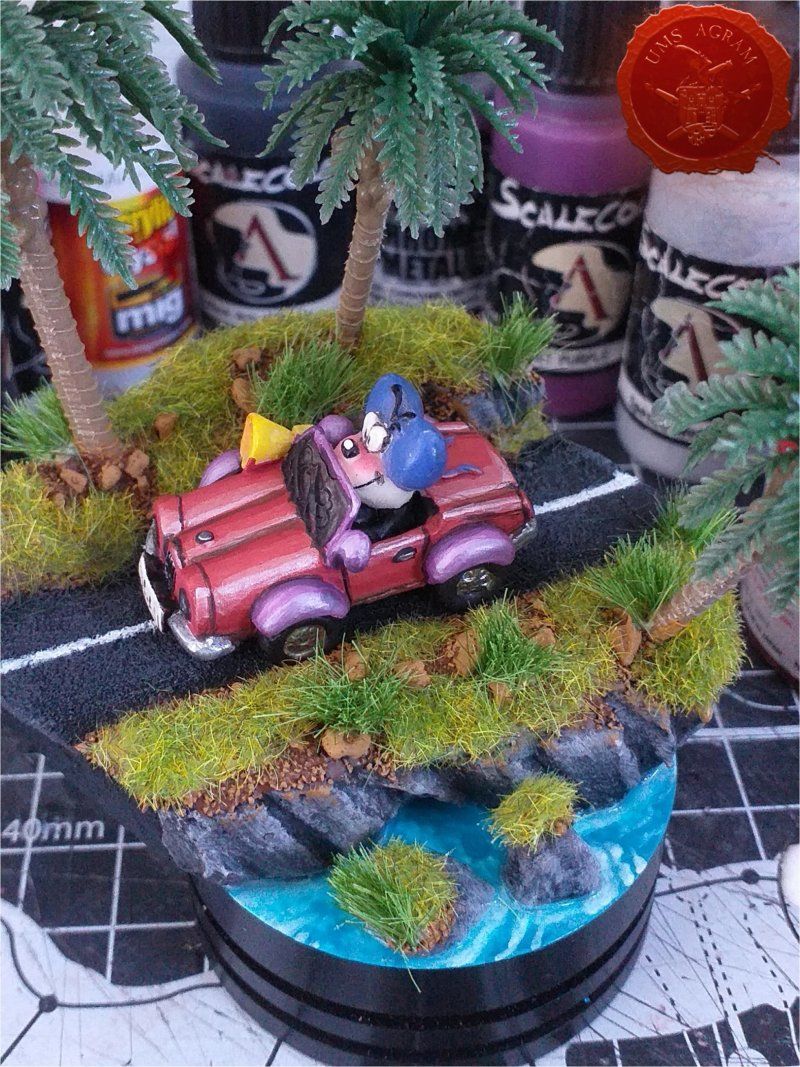
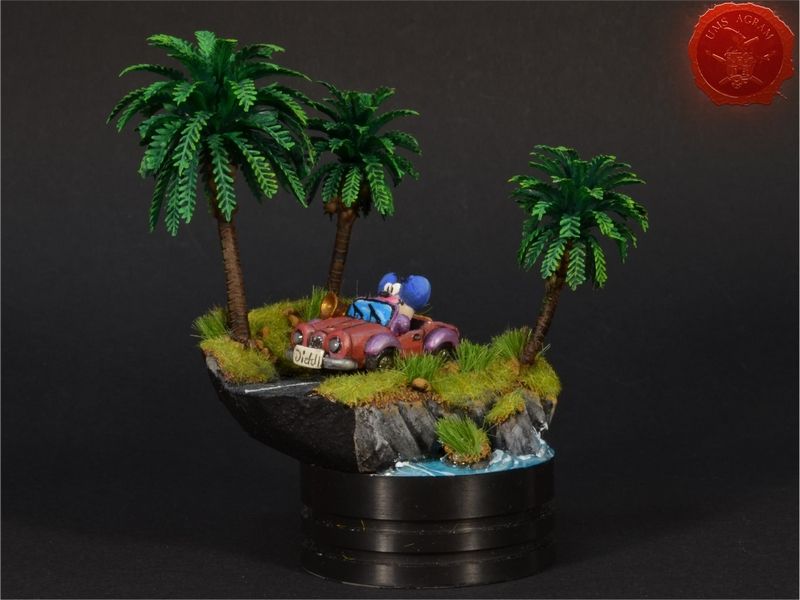
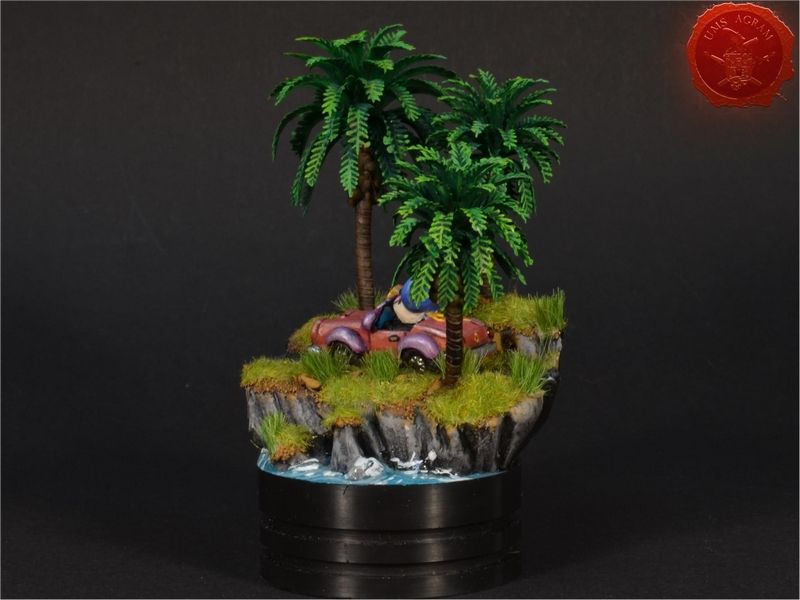
I placed all the bits in their place. I was satisfied and I proceeded to paint the diorama and add vegetation.
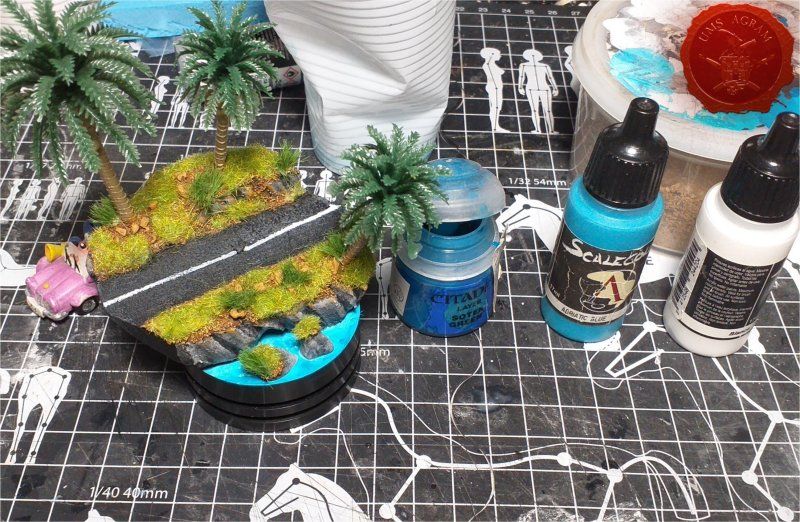
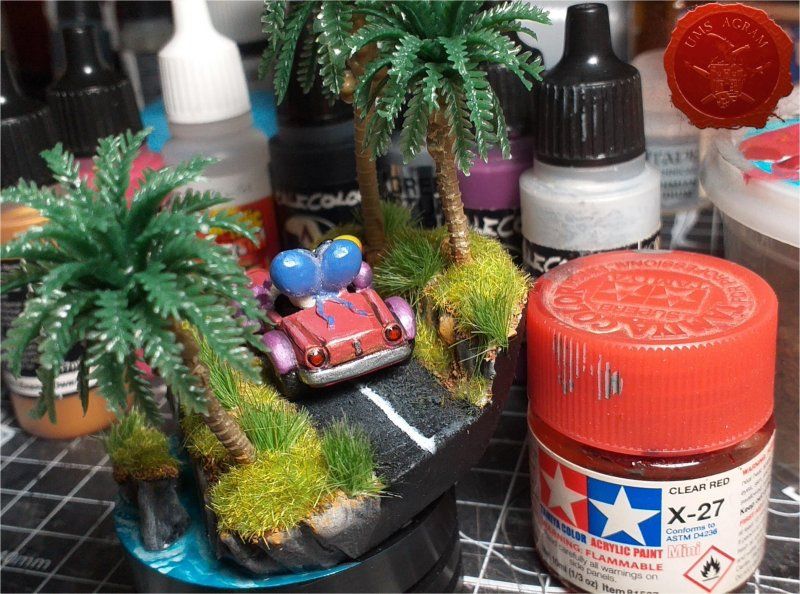
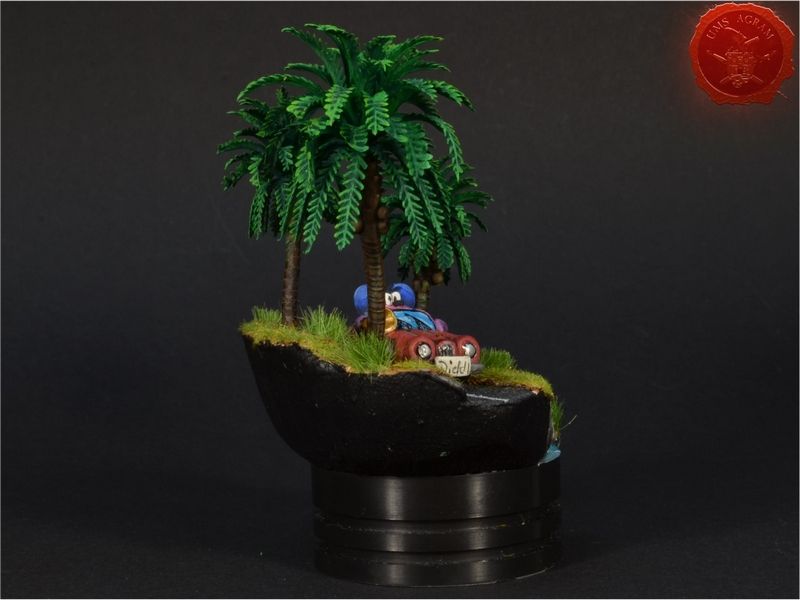
I painted the base with Pebeo Deco paints: Black, Brown, Ocher and White. I painted the road with Pebeo Deco Black and a dark gray mixture of Black and White. The line is drawn in Pebeo Deco White. I painted the water with Scalecolor paints: Arctic Blue and White as well as a Citadel one - Sotek Green.
I decided to paint the car with a mixture of metallic and matte paints from Scalecolor. I mixed in a mix of Dwarven Gold and Fuchsia and Speedd Metal and Sunset Purple. I painted the chrome parts with GSW Chrome, and I first painted the breaking lights in Chrome and then covered it with Tamiya Clear Red. When the paint dried, I made a calotte from Ammo Acrylic Crystal.
I painted the palm tree brown, covered it with black washem and made highlights. I painted the leaves with Scalecolor paints.
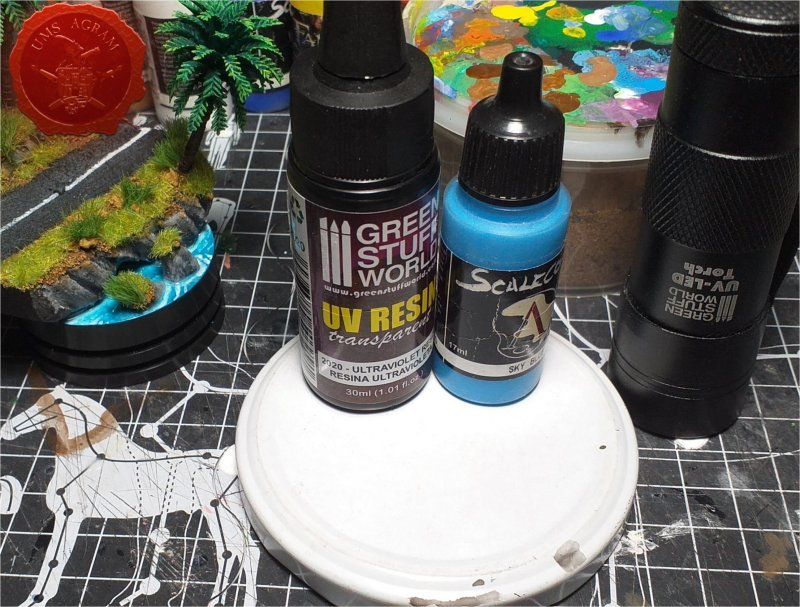
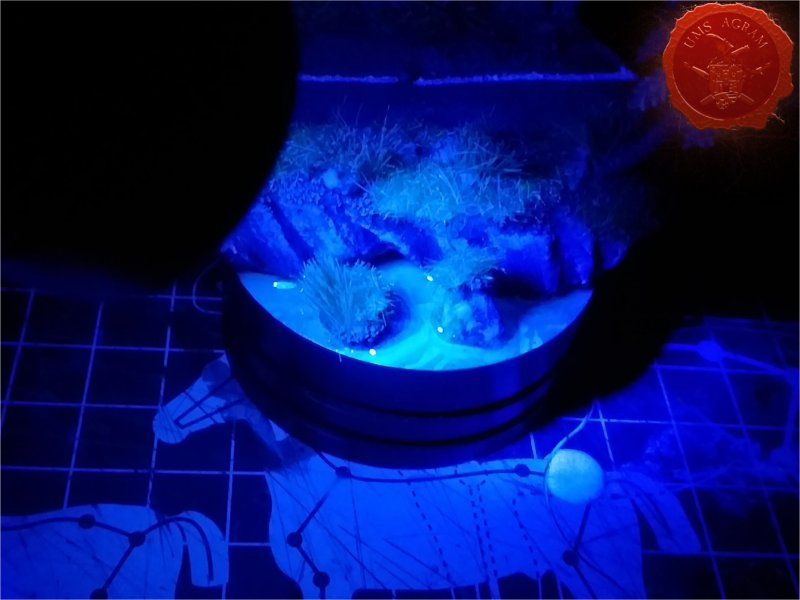
For the very end of making the diorama, I left adding the resin. Given the round base and a slightly more specific geometry at the points where the terrain merges with the base, I opted for a UV resin that allows me to work without making a dam around the base. GSW UV resin is very easy to use. Since it is gel-like, not liquid, it can be easily placed on the base and when you are satisfied with the look, it is just "baked" using a UV lamp. Its only drawback is that it cannot be tinted with acrylic paints.
On June 20-21 we attended 13th Trofeo San Giusto in Trieste, Italy.
It was held in Palazzo Vivante in the heart of Trieste and gathered miniature painters from Spain, Italy, France, England, Germany, Austria and I was the only participant in the miniature painting part of the competition from Croatia
As always we awarded the best of show prize as voted by our members. This time the prize went to Mr Alessandro Baialardo from Italy. And I managed to walk away with a gold, a silver and four bronze medals in Standard categories.
"
["content_hrv"]=>
string(7180) "
20. i 21. lipnja nastupili smo na 13. Trofeo San Giusto u Trstu u Italiji.
Natjecanje se održavalo u predivnoj palači Vivante u samom centru Trsta i okupilo je minijaturiste iz Španjolse, Italije, Francuske, Engleske, Njemačke, Austrije, a ja sam bio jedini na minijaturističkom dijelu natjecanja koji je branio boje Hrvatske.
Kao i uvijek na velikim natjecanjima, pripala mi je čast da dodijelim Best of Show nagradu po izboru članova UMS Agram. Ovoga puta, nagrada je otišla u ruke g. Alessandra Baialarda iz Italije koji je dobio naš ekskluzivni trofej Crne kraljice, monografiju o Udruzi te bocu Teranina. Na kraju uspio sam osvojiti zlato, srebro i četiri bronce u Standardnim kategorijama.
I recently was approached by the Historical Museum of Oslo to make three miniature dioramas for their exhibition MUMMY - a display of ancient Egyptian artefacts and mummies. Their requirements were that each of the three dioramas would portray a part of the life of one of the mummies from the exhibition, Dismut, a temple guardian’s daughter. Her Life, her Death and her Afterlife. In addition, they gave the maximum size of the display. This left me a lot of freedom for interpretation and to make the dioramas in my own way and style. In this article I’ll take you through part of my process for developing the three concepts. For a more detailed breakdown of the steps it took to complete the dioramas, see the videos.
My first focus was on the miniatures required. I searched online 3D-file shops to see what was already available. I knew this would be one of my limitations as there was no time or budget to 3D design all objects and characters required for all three dioramas. I found a pack of ancient Egyptian field workers, and so the Life diorama was created with this pack in mind - a tranquil scene by the Nile River, with workers harvesting wheat as Dismut observes from a higher vantage point. This diorama was also an opportunity to include some of the animals featured in the exhibition, so I found a cat and a mouse STL (and later a crocodile as well). As Dismut is not a famous pharaoh, there were obviously no STLs available of her, so I commissioned two 3D sculpts of her, giving me the chance to have her in the exact positions I needed for Life and Afterlife. In Death she would only appear as a mummified figure, easily available online.
I wanted the diorama to read from left to right, as the three dioramas would be displayed one next to the other, so as well as reading the specific Life diorama from left to right, I also wanted the entire display of all three dioramas to lead from left to right. I decided that from left to right the dioramas would also go from light to dark, Life being the lightest in tone and colour and Afterlife the darkest, reflecting the dioramas’ subjects. I decided on the scale for the entire display, around 50mm for humans, as this would be small enough to fit all the elements I needed, but large enough to fill up the dioramas with the amount of elements I found as STL’s and save me some time on not having to paint too many tiny details. I adjusted all STL’s to this scale, and found some realistic wheat plants online at the correct scale as well. And so the concept sketch for the Life diorama came together.
I knew that the Death diorama would be a burial ritual underground. I found a STL pack of several of the objects found in Tutankhamun’s grave, a burial ritual STL pack with two workers carrying a mummy and an ancient Egyptian priest. This would give me the scene. As the dioramas were going to have to be made as cubes, closed on all sides with walls, except for the front, as opposed to the open dioramas on display bases that we are used to, a part of planning each scene was also figuring out how to make the two sides and back panel a natural part of the dioramas. In Life this was an impossible task as no outdoor area is a cube, but I decided on making each side a rocky cliff and hoping the illusion of the scene would make the unaturally geometrical shape of the landscape become less visible. For Death my solution was a roller with Egyptian hieroglyphs. With this I could fill out each wall with historically accurate symbols and this way create interest in the surroundings of the scene as well. And for Afterlife, as this is already a “supernatural” scene, the walls would be bricks, extending the typical art found in Egyptian tombs portraying the Egyptian afterlife of Duat, into a 3D space. Generally I found a lot of inspiration and direction for this entire project from ancient Egyptian art and wall paintings.
The Afterlife diorama would have to have an Osiris character, the Egyptian God of the Dead, overseeing Dismut’s journey to Duat. As all STLs I could find of him had warrior poses, I instead commissioned a seated Osiris figure, as well as the scale that would measure Dismut’s heart against a feather, and thus if she is worthy of the Afterlife. I found a STL of Thoth, taking notes, and thought it suitable for the God judging the dead - in this case Dismut.
After the concepts were approved by the museum, so started a several months long process of getting the MDF walls for the cubes, cutting, carving and gluing XPS foam at the correct angles, sizes and shapes, painting around 40 miniature characters and objects, with airbrush and brush, creating and painting the landscapes, pouring epoxy resin for the Nile River as well as many other smaller and larger tasks. Of the many ideas that came during the making of the dioramas (not reflected in the concept sketches), one that I think especially contributed to the overall look of the final display, was the fact that I decided that each diorama would have its own main colour. Yellow for Life, sun and desert, Red for Death, underground an earthy, and Blue for Afterlife, cold and melancholic. This would differentiate the dioramas from each other even when being viewed from a distance, as well as give a natural progression from warm to cold, another way to add contrast and make the dioramas read in my preferred direction, from left to right. This was achieved most obviously through the choice of oil colours used to shade the three dioramas. Apart from that, the acrylic paints chosen are the same for all three dioramas, giving a cohesion of colour as well as being based on the available pigments they would have had at the time in Ancient Egypt - mineral pigments like lapis lazuli, red and ochre, soot for black, copper compounds for blue and green and synthetic pigments like Egyptian blue.
The final result is displayed here and will also be on display at Oslo’s Historical Museum for the foreseeable future. If you visit the city, make sure to stop by and have a look at the final display.
"
["content_hrv"]=>
string(8826) "
Nedavno me kontaktirao Povijesni muzej u Oslu da izradim tri minijaturne diorame za njihovu izložbu MUMIJA - prikaz drevnih egipatskih artefakata i mumija. Njihovi zahtjevi bili su da svaka od tri diorame prikazuje dio života jedne od mumija s izložbe, Dismut, kćeri čuvara hrama. Njezin život, smrt i zagrobni život. Osim toga, dali su maksimalnu veličinu prikaza. To mi je ostavilo puno slobode za interpretaciju i izradu diorama na moj vlastiti način i stil. U ovom članku provest ću vas kroz dio svog procesa razvoja triju koncepata. Za detaljniji pregled koraka potrebnih za dovršetak diorama pogledajte videozapise.
Moj prvi fokus bio je na potrebnim minijaturama. Pretražio sam online trgovine s 3D datotekama kako bih vidio što je već dostupno. Znao sam da će to biti jedno od mojih ograničenja jer nije bilo vremena ni proračuna za 3D dizajn svih predmeta i likova potrebnih za sve tri diorame. Pronašao sam skupinu drevnih egipatskih poljskih radnika, pa je diorama Život nastala imajući tu skupinu na umu - mirna scena uz rijeku Nil, s radnicima koji žanju pšenicu dok Dismut promatra s više točke. Ova diorama bila je i prilika za uključivanje nekih životinja predstavljenih na izložbi, pa sam pronašao mačku i miša u STL-u (a kasnije i krokodila). Budući da Dismut nije poznati faraon, očito nije bilo dostupnih STL-ova za nju, pa sam naručio dvije 3D skulpture, što mi je dalo priliku da je imam u točnim položajima koji su mi bili potrebni za Život i Zagrobni život. U Smrti bi se pojavila samo kao mumificirana figura, lako dostupna online.
Želio sam da se diorama čita slijeva nadesno, budući da bi se tri diorame prikazale jedna pored druge, pa sam, osim što se specifična diorama Života čita slijeva nadesno, također želio da cijeli prikaz sve tri diorame ide slijeva nadesno. Odlučio sam da će diorame slijeva nadesno ići od svijetlog prema tamnom, pri čemu će Život biti najsvjetliji po tonu i boji, a Zagrobni život najtamniji, odražavajući subjekte diorama. Odlučio sam se za mjerilo za cijeli prikaz, oko 50 mm za ljude, jer bi to bilo dovoljno malo da stanu svi potrebni elementi, ali dovoljno veliko da ispuni diorame količinom elemenata koje sam pronašao kao STL-ove i uštedi mi vrijeme jer ne bih morao slikati previše sitnih detalja. Prilagodio sam sve STL-ove ovom mjerilu i pronašao sam neke realistične biljke pšenice na internetu u ispravnom mjerilu. I tako je nastala konceptualna skica za dioramu Života.
Znao sam da će diorama Smrt biti pogrebni ritual pod zemljom. Pronašao sam STL paket nekoliko predmeta pronađenih u Tutankamonovoj grobnici, STL paket pogrebnog rituala s dva radnika koji nose mumiju i drevnim egipatskim svećenikom. To bi mi dalo scenu. Budući da su diorame morale biti izrađene kao kocke, zatvorene sa svih strana zidovima, osim sprijeda, za razliku od otvorenih diorama na izložbenim postoljima na koje smo navikli, dio planiranja svake scene bio je i smišljanje kako učiniti dvije strane i stražnju ploču prirodnim dijelom diorama. U filmu Život to je bio nemoguć zadatak jer nijedno vanjsko područje nije kocka, ali odlučio sam svaku stranu napraviti kao stjenovitu liticu i nadao se da će iluzija scene učiniti neprirodno geometrijski oblik krajolika manje vidljivim. Za Smrt moje rješenje bio je valjak s egipatskim hijeroglifima. S tim sam mogao ispuniti svaki zid povijesno točnim simbolima i na taj način stvoriti interes i za okolinu scene. A za Zagrobni život, budući da je ovo već „natprirodna“ scena, zidovi bi bili od cigli, proširujući tipičnu umjetnost pronađenu u egipatskim grobnicama koje prikazuju egipatski zagrobni život Duata u 3D prostor. Općenito sam pronašao mnogo inspiracije i smjernica za cijeli ovaj projekt u drevnoj egipatskoj umjetnosti i zidnim slikama.
Diorama zagrobnog života morala bi imati lik Ozirisa, egipatskog boga mrtvih, koji nadgleda Dismutovo putovanje u Duat. Budući da su svi STL-ovi koje sam mogao pronaći o njemu imali ratničke poze, umjesto toga sam naručio sjedeću figuru Ozirisa, kao i vagu koja bi mjerila Dismutovo srce u odnosu na pero, te time utvrdila je li dostojna zagrobnog života. Pronašao sam STL Thotha, bilježio i smatrao sam da je prikladan za Boga koji sudi mrtvima - u ovom slučaju Dismuta.
Nakon što je muzej odobrio koncepte, započeo je višemjesečni proces nabave MDF zidova za kocke, rezanja, rezbarenja i lijepljenja XPS pjene pod ispravnim kutovima, veličinama i oblicima, oslikavanja oko 40 minijaturnih likova i predmeta airbrushom i kistom, stvaranja i oslikavanja pejzaža, izlijevanja epoksidne smole za rijeku Nil, kao i mnogih drugih manjih i većih zadataka. Od mnogih ideja koje su se pojavile tijekom izrade diorama (koje nisu odražene u skicama koncepta), jedna za koju mislim da je posebno doprinijela ukupnom izgledu konačnog prikaza bila je činjenica da sam odlučio da će svaka diorama imati svoju glavnu boju. Žuta za život, sunce i pustinju, crvena za smrt, podzemlje i zemljanost, a plava za zagrobni život, hladnu i melankoličnu. To bi razlikovalo diorame jednu od druge čak i kada se gledaju iz daljine, kao i dalo prirodan prijelaz od toplog prema hladnom, još jedan način dodavanja kontrasta i da se diorame čitaju u mom željenom smjeru, slijeva nadesno. To je najočitije postignuto odabirom uljanih boja korištenih za sjenčanje triju diorama. Osim toga, akrilne boje odabrane su iste za sve tri diorame, što daje koheziju boja, a ujedno se temelji na dostupnim pigmentima koje su imali u to vrijeme u drevnom Egiptu - mineralni pigmenti poput lapis lazulija, crvene i oker boje, čađa za crnu, spojevi bakra za plavu i zelenu te sintetički pigmenti poput egipatske plave.
Konačni rezultat je ovdje izložen i bit će izložen u Povijesnom muzeju u Oslu u doglednoj budućnosti. Ako posjetite grad, svakako navratite i pogledajte konačni postav.
On 09-10.05.2026. we held a new weekend miniature painting workshop. This time it was the turn of a dwarf in 75mm scale.
The workshop was held over two days (a whole weekend) and the participants painted a 75mm miniature dwarf. The focus of these lectures was painting various textures - metal, human skin, textiles and leather. Water-based acrylic paints were used in the workshop. For this purpose, the workshop leader, Ivan Knezović, chose a 75mm miniature dwarf from Durgin Paint Forge, sculpted by Carlos Perez Bugedo. The lectures were adapted so that the leader devotes equal time to all participants and can be adapted to all categories of miniaturists (from beginners to slightly more advanced).
The workshop took place as follows:
First, the lecturer sits at his desk and explains and demonstrates each step in painting a miniature/model on his specimen. His work is displayed on a screen via a camera and projector, which the participants listen to, watch, and ask questions about.
Then, the participants sit at their desks and apply the knowledge they have gained. The facilitator circulates among the participants and checks how each participant is doing. This way, he or she can adapt to each participant individually.
The workshop will include the following thematic units:
1. NMM (Non metallic metal)
2. Reflections of ambient colors on metal
3. Steel / gold
4. Face painting (male)
5. Adding vibrancy to the face (filters)
6. Extracting textures from fabric, metal and leather
09-10.05.2026. smo održali novu vikend Radionicu bojanja minijatura. Ovoga puta na redu je bio patuljak u 75mm mjerilu.
Radionica se provodila kroz dva dana (cijeli vikend) i polaznici su bojali 75mm minijaturu patuljka. Fokus ovih predavanja bilo je bojenje raznih tekstura – od metala, ljudske kože, tekstila i kože (leather). U sklopu radionice korištene su akrilne boje na bazi vode. U tu svrhu, voditelj radionice, Ivan Knezović, izabrao je 75 mm minijaturu patuljka tvrtke Durgin Paint Forge, koju je sculptao Carlos Perez Bugedo. Predavanja su prilagođena tako da voditelj posveti jednako vrijeme svim polaznicima i može se prilagoditi svim kategorijama minijaturista (od početnika do malo naprednijih).
Radionica se odvijala na sljedeći način:
Prvo, predavač sjedi za svojim stolom te objašnjava i demonstrira pojedini korak u bojanju minijature/makete na svojem primjerku. Njegov rad se preko kamere i projektora prikazuje na platnu što polaznici slušaju, gledaju, ali i postavljaju pitanja.
Potom, polaznici sjedaju za svoje stolove i primjenjuju stečeno znanje. Voditelj kruži između polaznika i provjerava kako svakom polazniku ide. Na taj način, može se prilagoditi svakom polazniku ponaosob.
Radionica će uključivati sljedeće tematske cjeline:
1. NMM (Non metallic metal)
2. Refleksije boja iz okoline na metalu
3. Čelik / zlato
4. Bojanje lica (muškog)
5. Dodavanje živosti na lice (filteri)
6. Izvlačenje tekstura tkanine, metala i kože (leather)