Painting a lightsabre
If you're painting some of the Star Wars Legion or similar figures, you'll want the Jedi or Sith sabers to look good. There are at least three or four ways to paint them, and I'm going to show two very, very similar ones here. Although these methods do not show the lightsaber "realistically" as in the movie, they achieve a satisfactory effect very quickly and easily. And the secret of everything is in ... glazes.
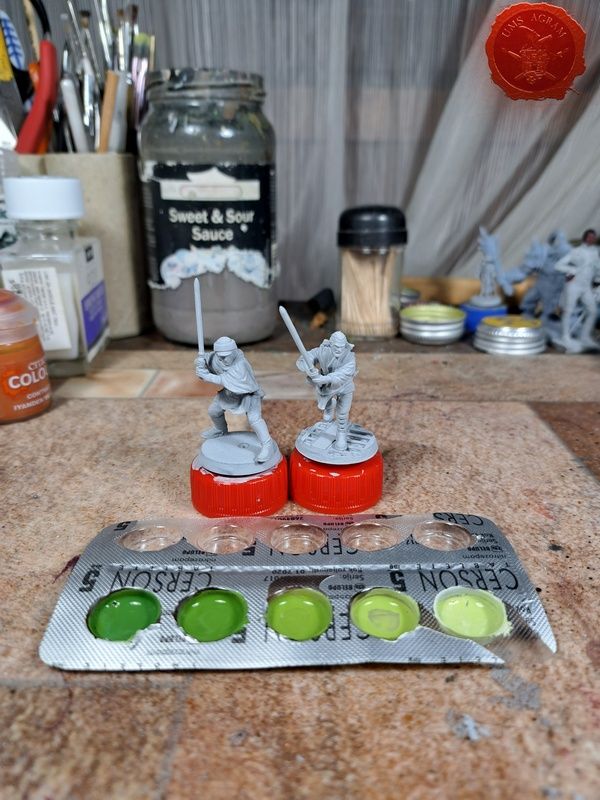
Prepare your Jedi or Sith figures and prepare 4-5 shades of the color you want or need to paint the lightsaber. The difference in the darkest and lightest shade should be whatever you want, although I think that the contrast in this case can hardly be overdone. The darkest shade should not be too dark (perhaps like a kind of midtone if you were to dye clothes in the same color), but it should have the consistency of a basecoat. Other shades should be more rare, i.e. the consistency of thicker glazes.
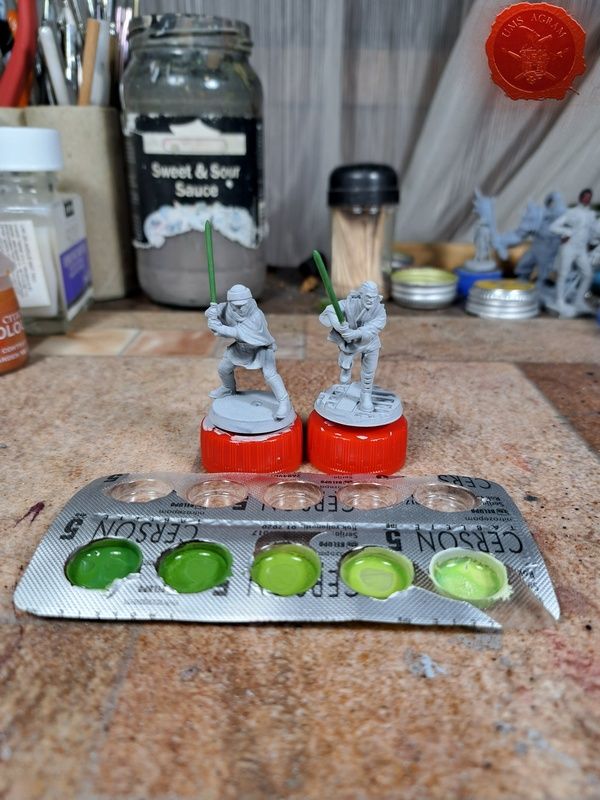
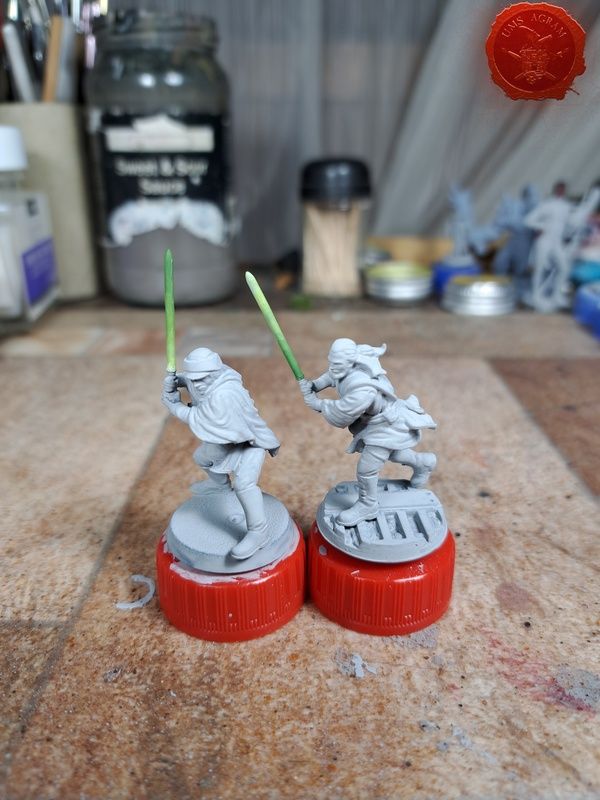
I start from the darkest shade and that's why it has a thicker consistency than the others. No special reason, just out of habit. However, if it suits you, you can also start with the lightest one. When the basecoat was dry, I painted 4/5 of the saber with the first following shade. So about 1/5 is left in the darkest basecoat. As I am painting 2 figures in this tutorial, I left the tip of one saber the darkest, and the base (near the hilt) of the other saber. In the end, you will choose which effect you like better.
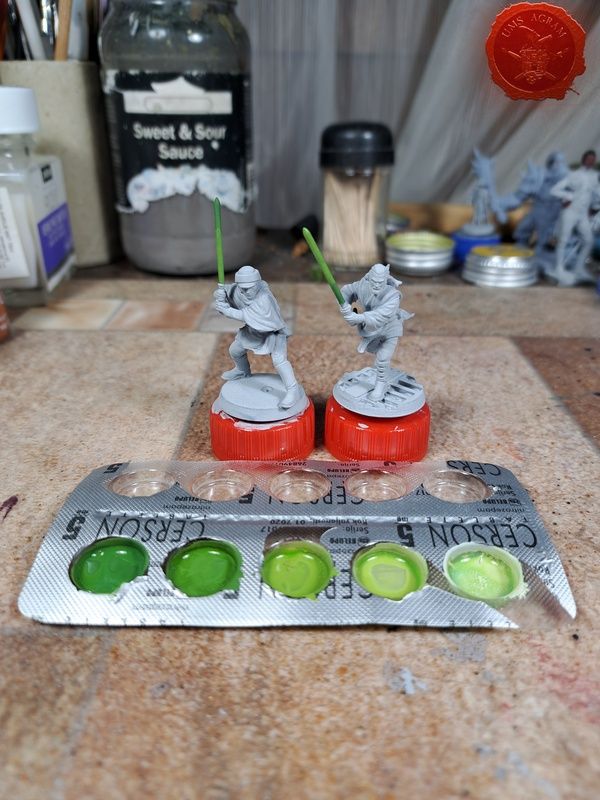
Apply the next shade to 3/5 of the saber and continue until you reach the lightest shade that will cover only 1/5 of the saber. You should now have a saber, painted in 5 shades each covering roughly 1/5 or 20% of the saber. For some, this will be satisfactory because from a distance the saber already looks decent.
For those who want more, here's how to improve the result: You can dilute the existing glazes even more and paint the transitions between the two shades with them. Simply, if you are not satisfied with the transitions, you will have to play with the glazes a bit, back and forth. If at first it doesn't seem like it, the glaze is probably wet. Wait for it to dry completely and then decide if you need another one or not. If by chance the contrast between the darkest and lightest shades is too strong for you, make a thin glaze from the middle shade and go over the entire saber with it.
And finally, let me mention what are the other 2 ways to paint a lightsaber. The third is that after the basecoat, paint the line of highlite with the length of the saber with several shades, each of which is thinner than the previous one. This suits the movie better, but it's only effective from one angle. That's ok, if you're going to photograph the figure for some boxart, instagram, etc., but if you want it to look effective from all angles, the first one is better. And the last way is that some companies produce paint that conducts electricity and lights up (Green Stuff World). This requires that you paint the saber in that color and somehow connect it with wires to the battery, which you will hide somewhere in the base. But I leave that step to you.
Latest articles
- SFRJ 1986 v2 Diorama part 5 Marko Paunović, 19th January 2026
- SFRJ 1986 v2 Diorama part 4 Marko Paunović, 19th January 2026
- SFRJ 1986 v2 Diorama part 3 Marko Paunović, 19th January 2026
- SFRJ 1986 v2 Diorama part 2 Marko Paunović, 19th January 2026
- SFRJ 1986 v2 Diorama part 1 Marko Paunović, 19th January 2026
Latest battle-reports
- Kill Team - Blooded vs. Vespid Stingwings 28th February 2025, GW - Warhammer 40.000, and Antoni Pastuović (Imperial Guard)
- 22nd April 2022, GW - Warhammer 40.000, Borna Pleše (Space Marines) and Kristijan Kliska (Tau Empire)
- 17th November 2021, GW - Warhammer 40.000, and Nino Marasović (Space Marines)

