Stegaddon Conversion
In this article I will describe how I converted my first stegadon from a pug/eng. bulldog into something that looks a little more normal. First disclaimer, I really like this figure, I think this kit is the best that Lizardmen (Seraphon) have to offer at the moment and it has a lot of possibilities for a hobby enthusiast like me. One of them is to turn into one of my favorite lore characters - Mazdamundi.
This article is the first of a couple of them in which I describe that process, and I intend to write them as they arise; so let's start…
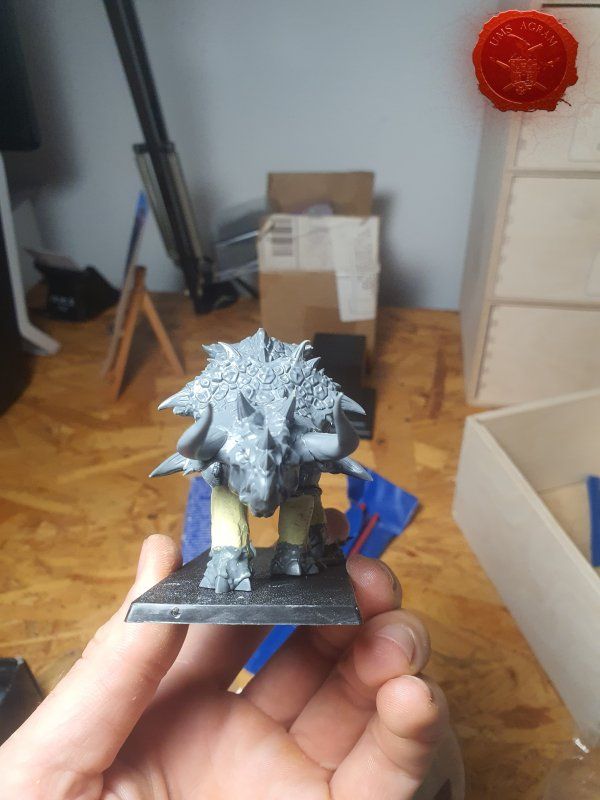
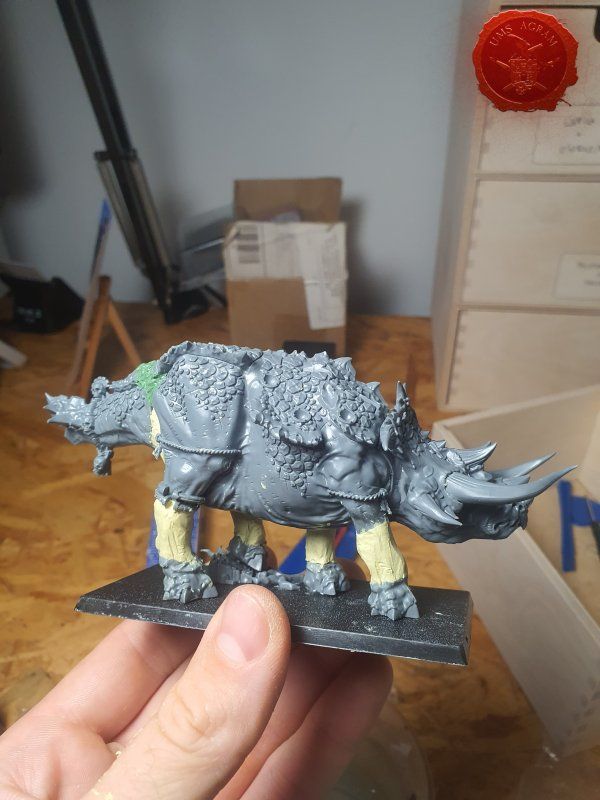
Step one: since I really like dinosaurs, I also follow their biology. Triceratops, the model from which our mentioned stegadon was created, is much slimmer and looks like a real animal, because it was. The Stegadon, which came from the minds of very creative people, is a fun model, a little goofy, very chunky, but not the "terrible beast" described in the Warhammer Fantasy books. At least not in 2023.
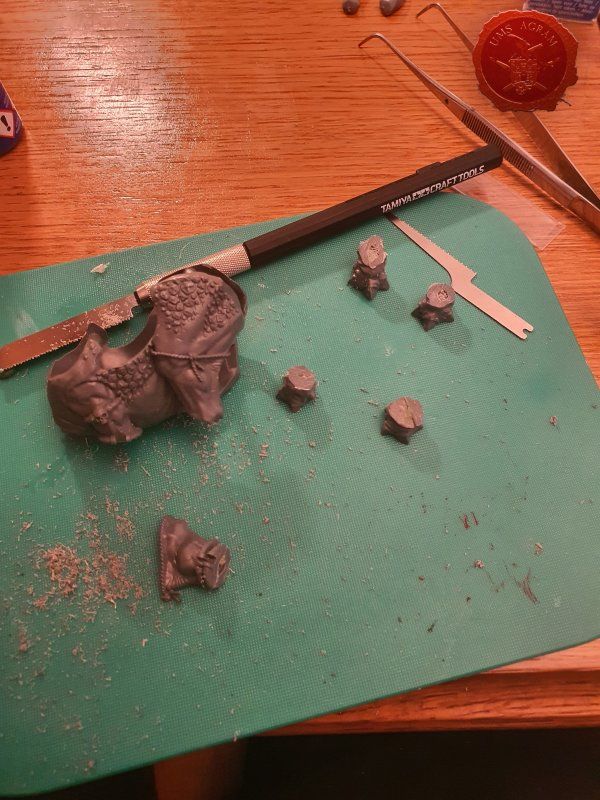
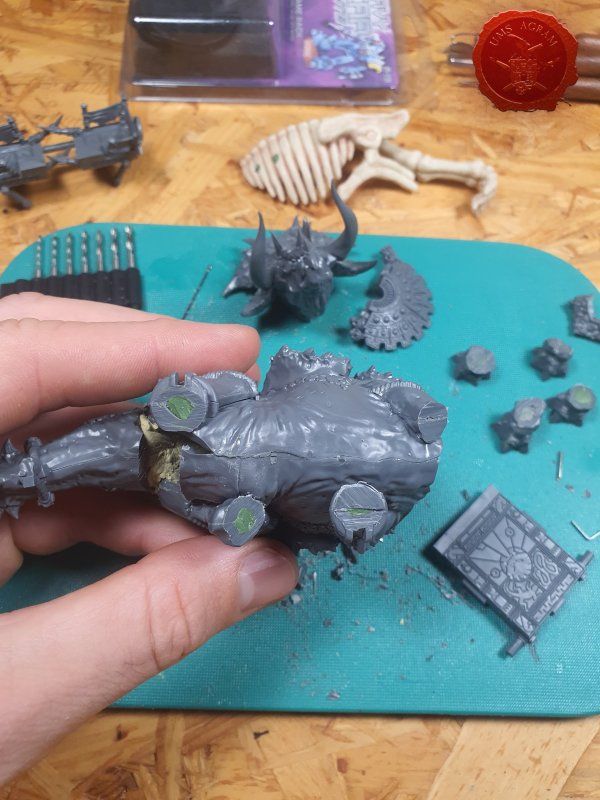
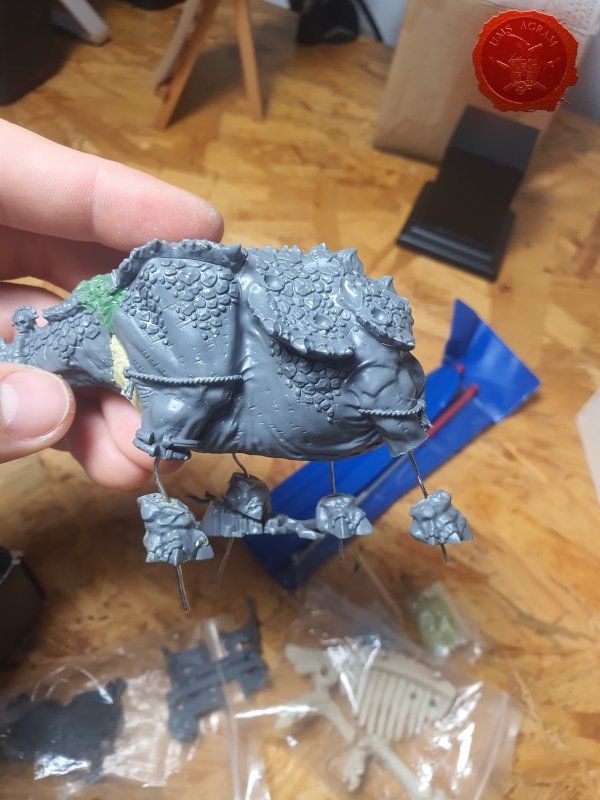
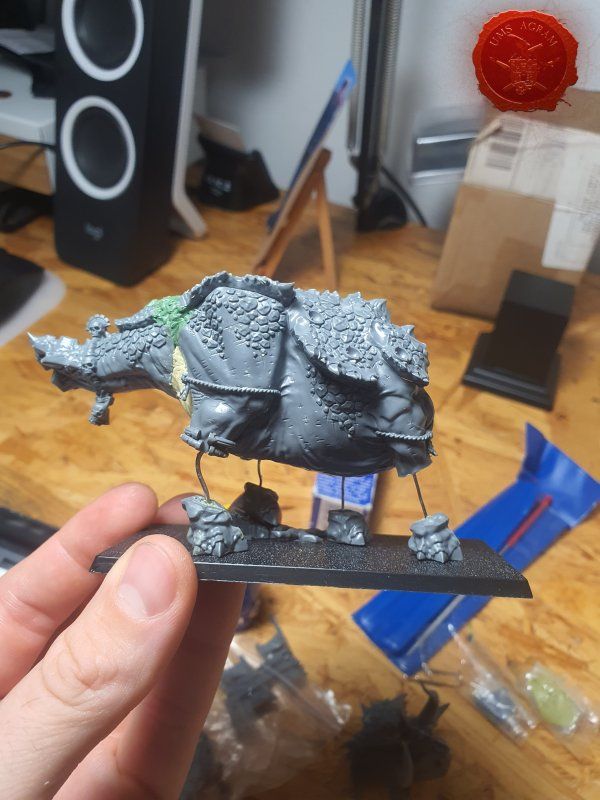
I came across a post online where someone had extended the legs on their stegadon and immediately fell in love with the idea. Saw an additional couple of pictures on how to do it and started. So the first thing was to cut the legs, on the joints or the practical rings that are on the legs. I then filled all the legs with green stuff and drilled holes for the pins.
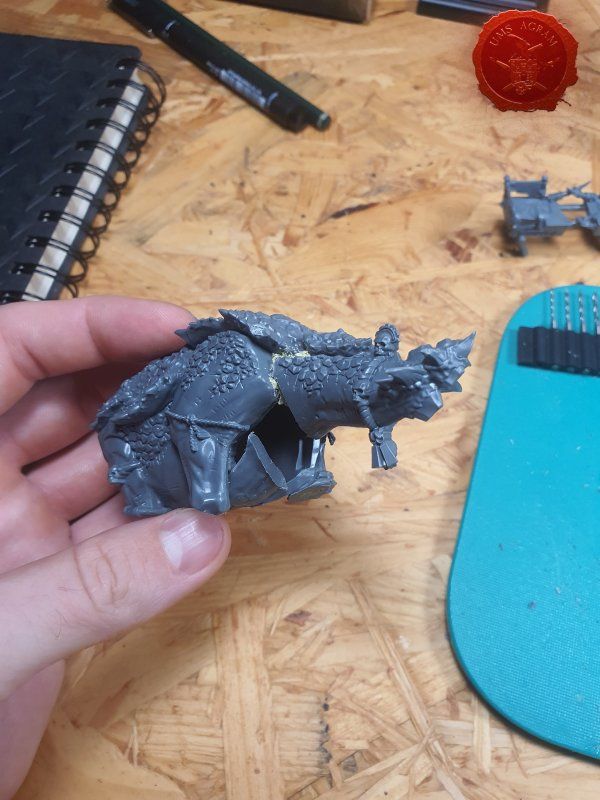
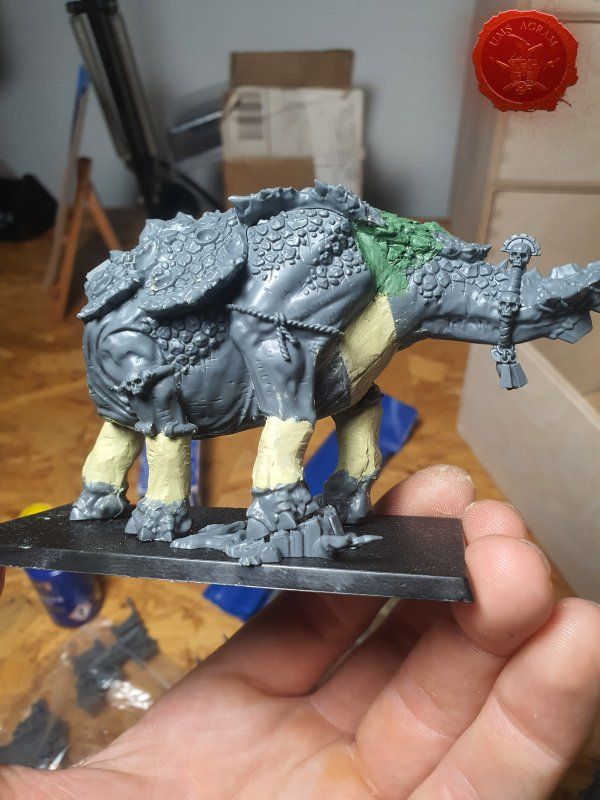
The next step was to raise the tail, because it is anatomically a strange position for the tail and it reminds us of the depictions of dinosaurs from the first half of the 20th century. Interesting throwback, but I don't care about it. So I sawed off the parts of the tail that connect to the lower half of the body and raised it and filled it with milliput to fix the position around which I can add volume.
Idući korak je bio pinanje spajalicama noge na aproksimiranu visinu koja bi mi bila adekvatna, te postava pinova u cca poziciju noge, koji bi se onda nastavili kroz bazu i savili za čvršći spoj s bazom.
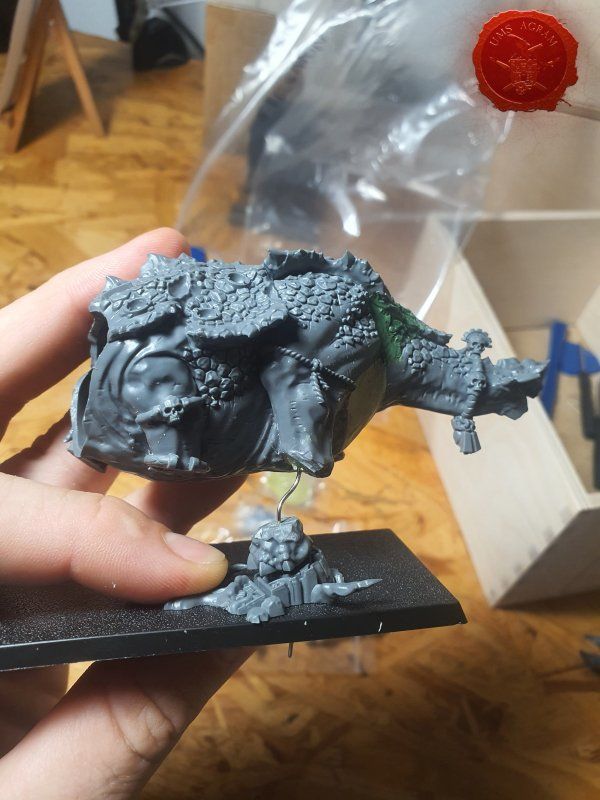
The next step was pinning the leg with staples to an approximate height that would be adequate for me, and placing the pins in the approximate position of the leg, which would then continue through the base and bend for a tighter connection with the base.
The tail, i.e. its lower side, is filled and shaped in a similar way. I decided to fill the upper side with green stuff (with which I have more experience), I used it to shape the bumps on the upper part of the skin.
Once I smoothed out the volume of the tail, I smoothed it out with wet tools and added small nicks to show the folds of skin seen on the rest of the model.
This completes the first part of Mazdamundi's model making - below I make the upper structure on the Stegadon and figure out how to mount the large metal (and heavy!) Slanna model on the plastic drilled stegadon model. To be continued...
Latest articles
- SFRJ 1986 v2 Diorama part 5 Marko Paunović, 19th January 2026
- SFRJ 1986 v2 Diorama part 4 Marko Paunović, 19th January 2026
- SFRJ 1986 v2 Diorama part 3 Marko Paunović, 19th January 2026
- SFRJ 1986 v2 Diorama part 2 Marko Paunović, 19th January 2026
- SFRJ 1986 v2 Diorama part 1 Marko Paunović, 19th January 2026
Latest battle-reports
- Kill Team - Blooded vs. Vespid Stingwings 28th February 2025, GW - Warhammer 40.000, and Antoni Pastuović (Imperial Guard)
- 22nd April 2022, GW - Warhammer 40.000, Borna Pleše (Space Marines) and Kristijan Kliska (Tau Empire)
- 17th November 2021, GW - Warhammer 40.000, and Nino Marasović (Space Marines)

