WW2 Monastery Scene – Reflections on the Diorama Composition

Marko Paunović, 22nd August 2024

In this series of articles, I will follow the creation of a diorama of a monastery set at the end of the Second World War when the Americans had already invaded Germany, which shows a company in the middle of a rest. These articles do not actually follow the chronological creation, but are arranged according to some thematic units.

Click for enlarged picture

After reading the title, you're probably wondering what this guy is going to be talking about? Rightfully so. Probably, even I would not understand what the writer wants to say if I read such a title. Probably some philosophy. And yes, you are right. But there is a reason why I am writing this text, so please be patient and give me a chance.

Namely, judging by a large number, and participating in an even larger number of competitions, I noticed that a lot of modelers have problems with the believability of the story of their diorama. Either they get lost in a pile of details (a kind of horror vacui), or the scene is much too big for the story it's telling (the exact opposite of horror vacui). Also, in a large number of works there is no "good" interaction between the actors or between the actors and the scene. Well, it all looks like Scotty just beamed them up in the middle of the scene.

This prompted me to write this article to describe the creative process of creating the diorama and its transformation as I completed individual elements. The fact that when I wrote previous articles that I found a sufficient number of photos of the entire diorama with elements in various stages of the project also helped.


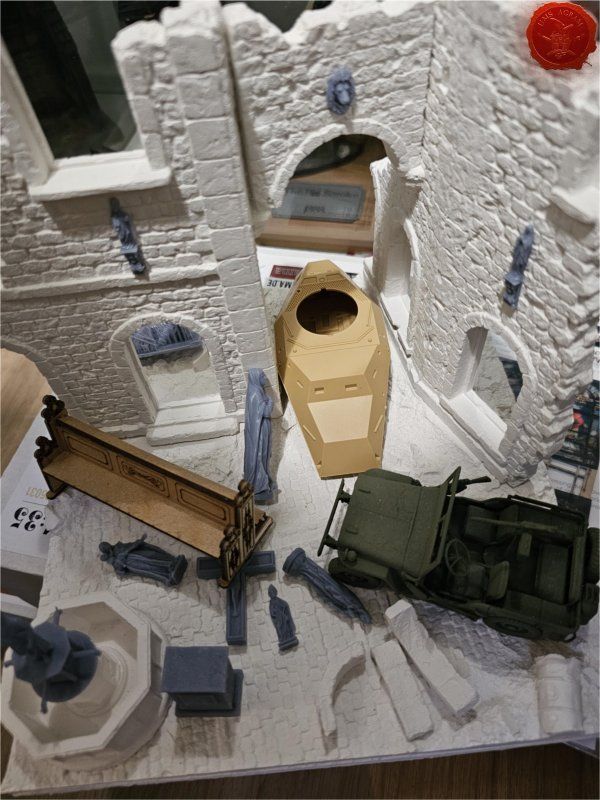
How did I come up with the idea for this diorama? For my birthday, Mario and Seb gave me two models. One was an ambulance Jeep (Mario) and the other an American armored Greyhound (Seb). This prompted me to plan a diorama that will contain those two models. Soon the FB feed reminded me of a scene from RT Diorama that seemed perfect to me. A jeep coming into the square, and an armored personnel carrier between two buildings peeking out of the rubble with half the building collapsed on top of it. Fantastic! Buy Marko. When the package arrived, unfortunately, Seb's armored car didn't fit between the two buildings, so he was out of the game. At the Zagreb Cup, I visited the Hobby Chest stand and found the SDKFZ 223 model there. Darko allowed me to open the box and measure the width of the vehicle. It turned out to be 5mm narrower than the passage. Fantastic. What's even better is that I found two sets of Americans with him just to complete my diorama.

Click for enlarged picture

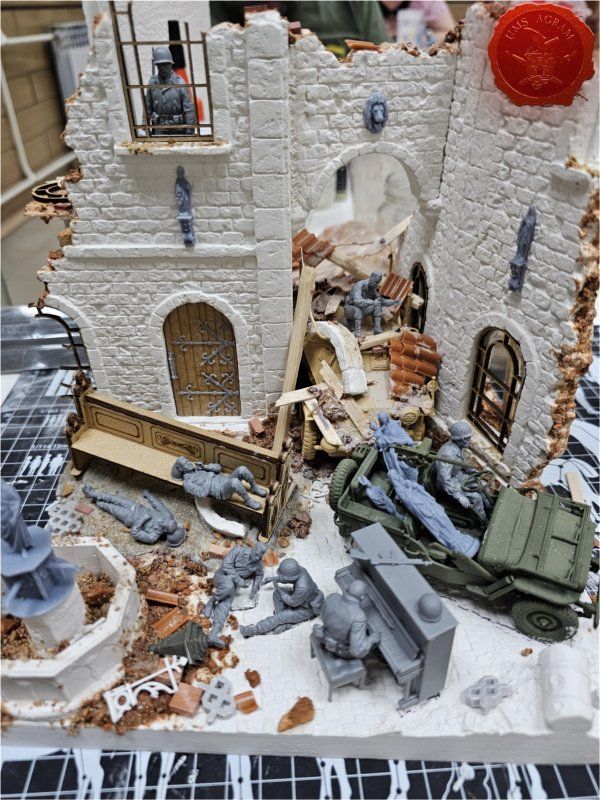
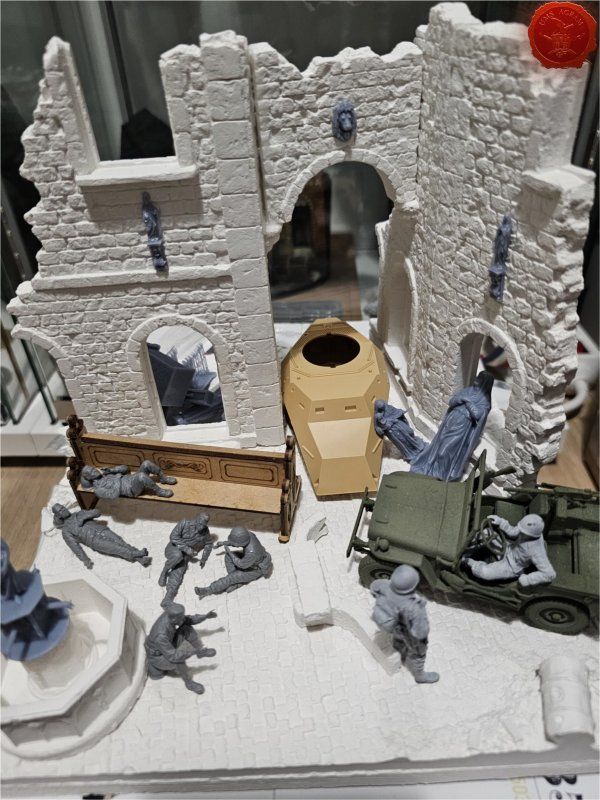
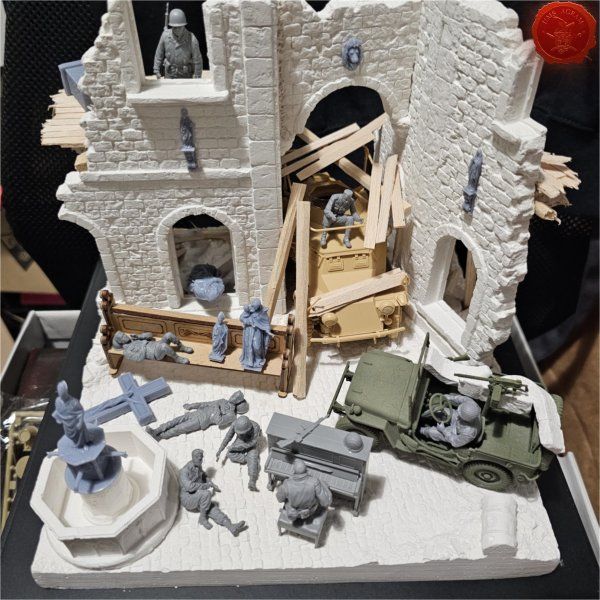
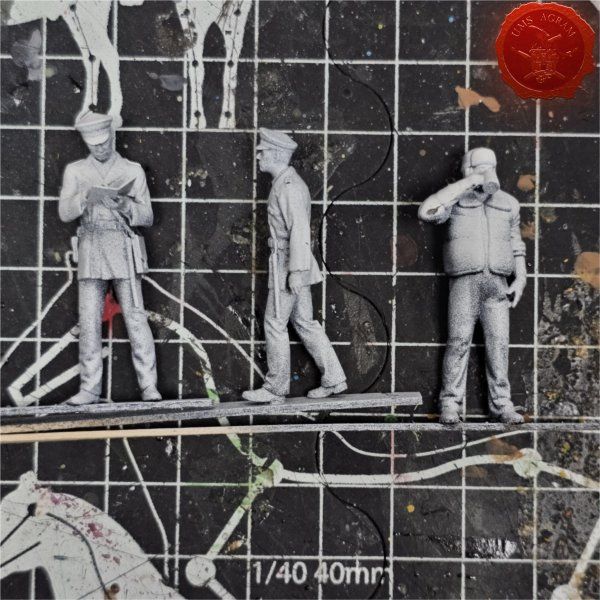
The figures I got were: two lying down, two lying down and playing cards, one sitting on his helmet reading something (newspaper), one standing and looking into the distance, one Jeep driver and one riding in a Jeep. Everything is super usable except maybe the one that drives. I scattered the team around the field as it seemed to me that it might work.

Click for enlarged picture

In the meantime, I had the idea to put together a MiniArt piano and set it up to play. With a bit of conversion (cutting and hand rotation) I succeeded in my plan. This required a new arrangement of pieces. The one standing will be on the hood of the battleship and will be looking towards the back of the diorama (down the road), and the others will be concentrated around the fountain. The statues will be part of the ruins.

Click for enlarged picture

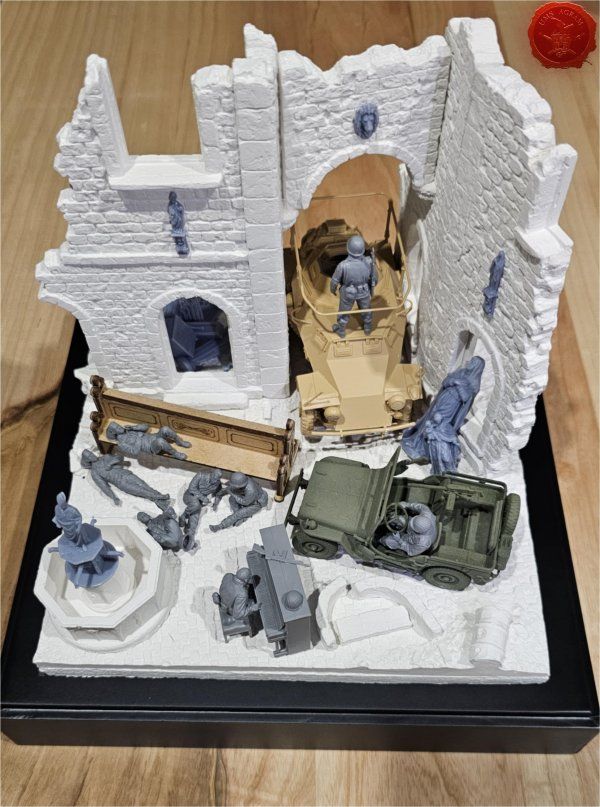
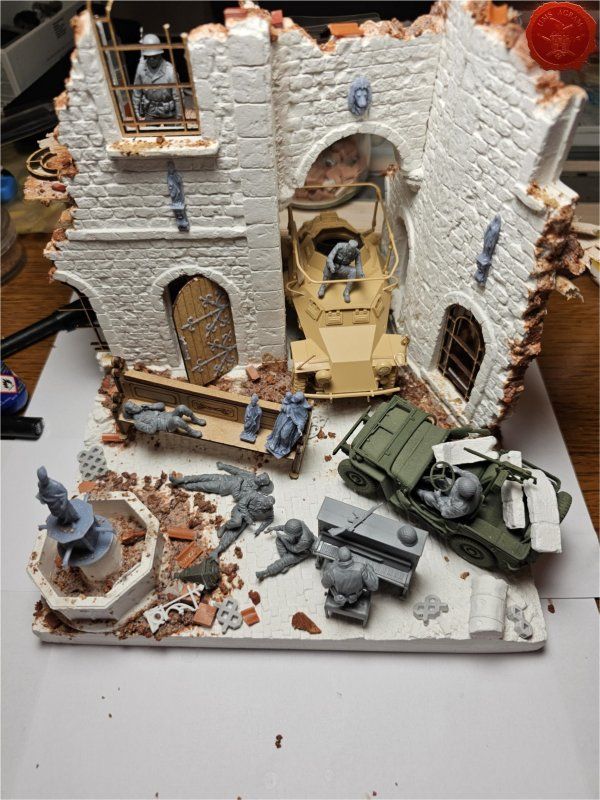
At one of the hobby corners on Wednesdays, someone from the team commented that my first floor was a little empty. I dismissed the idea, but it kept bugging me. Until I realized he was right. A series of figures followed and the only one that passed was the one standing and looking into the distance. But that makes me lose crew interaction with the wreck of the battleship. So I tested how it would look like the one reading the newspaper on it. I was not unhappy with the result. The bench, on the other hand, looked too big, so I decided to fill the part not occupied by the soldier with smaller statues. They were taken out and prepared for "liberation". Let's say the Jeep driver arrives to pick them up.

Click for enlarged picture

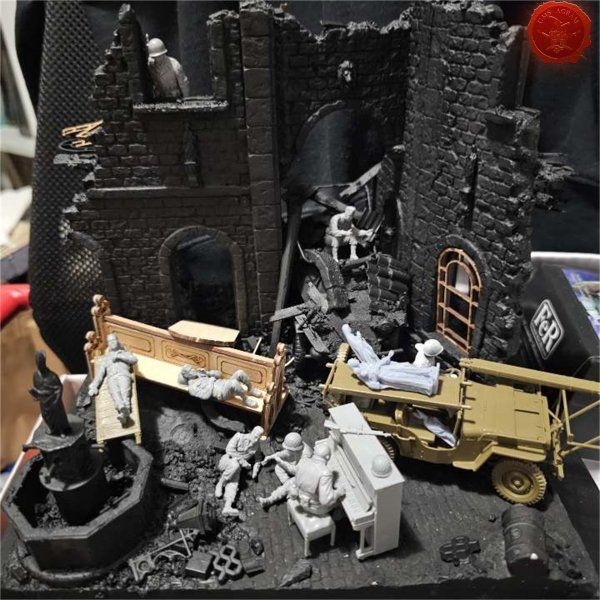
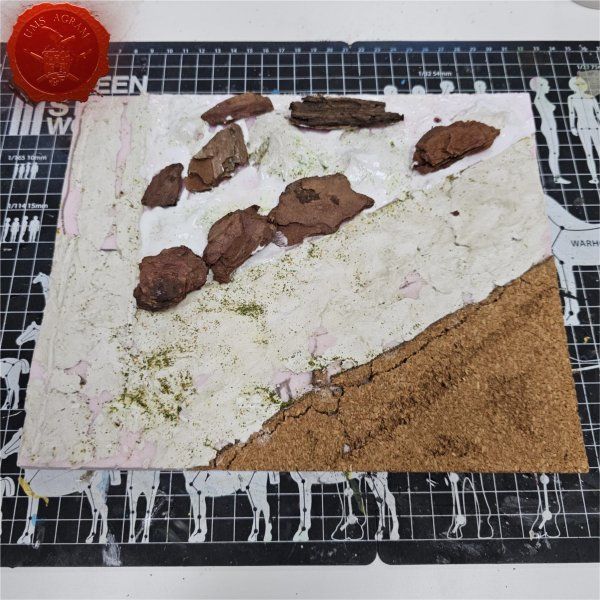
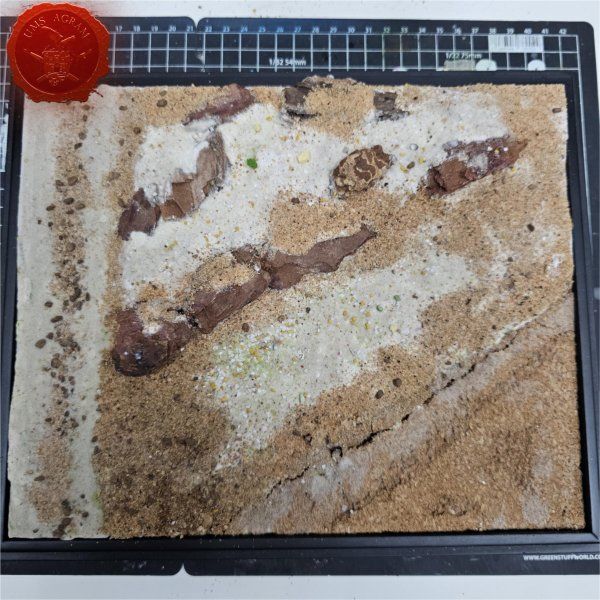
By setting the texture, the story more or less remained the same. There I had to position the bench as well as one lying down to fit into the volume added with DAS clay.

Click for enlarged picture

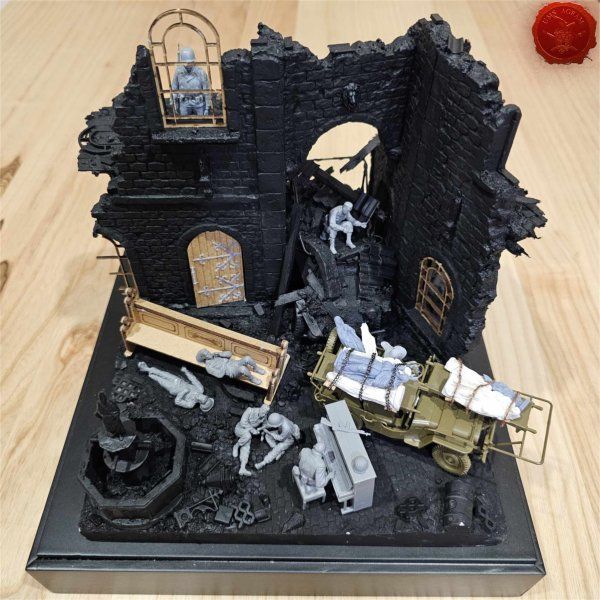
In the meantime, I assembled the ambulance Jeep (the one in the pictures before was a "placeholder" from another diorama). The ambulance Jeep has a scalameria carrying a stretcher. This gave me the idea to add statues to the stretcher. But it also turned Jeep in the other direction. He leaves with the statues.

Click for enlarged picture

I was finally satisfied with the story. In fact, the turning of the Jeep and the lack of interaction of the rest of the team with the driver who releases the statues gives the impression of alienation and lack of morale in extreme conditions. Everyone does their own thing even though they are together in a small space.

Click for enlarged picture

I hope that this journey through the making of a diorama gave you at least a little insight into the process of diorama composition. Each part must make sense and be clear about why it is there. Next time, we start with painting.

Latest articles

  • Back to Basics Workshops in Medveščak Library
              array(2) {
      ["Article"]=>
      array(10) {
        ["id"]=>
        string(3) "476"
        ["member_id"]=>
        string(2) "64"
        ["title_eng"]=>
        string(47) "Back to Basics Workshops in Medveščak Library"
        ["title_hrv"]=>
        string(68) "Back to Basics radionice bojanja minijatura u Knjižnici Medveščak"
        ["mask_eng"]=>
        string(45) "back_to_basics_workshops_in_medvescak_library"
        ["mask_hrv"]=>
        string(65) "back_to_basics_radionice_bojanja_minijatura_u_knjiznici_medvescak"
        ["content_eng"]=>
        string(5094) "

    Click for enlarged picture

    During October and November, we held our Back to Basics miniature painting workshops for the youngest at the Zagreb City Libraries.

    Click for enlarged picture

    Click for enlarged picture

    The first set of three workshops was held in the Youth Department of the Medveščak Library on October 2, 9 and 11, 2025.

    Click for enlarged picture

    Click for enlarged picture

    During the workshops, our youngest participants painted chibi figures from the UMS Agram line and made a castle from upcycled materials.

    Click for enlarged picture

    Click for enlarged picture

    Click for enlarged picture

    Click for enlarged picture

    Click for enlarged picture

    Click for enlarged picture

    Click for enlarged picture

    Click for enlarged picture

    More photos can be found on our social media.

    Click for enlarged picture

    " ["content_hrv"]=> string(5118) "

    Click for enlarged picture

    Tijekom listopada i studenog u Knjižnicama Grada Zagreba smo održali naše Back to Basics radionice bojanja minijatura za najmlađe. 

    Click for enlarged picture

    Click for enlarged picture

    Prvi set od tri radionice održan je u Odjelu za mlade Knjižnice Medveščak 2., 9. i 11.10.2025. 

    Click for enlarged picture

    Click for enlarged picture

    Tijekom radionica naši najmlađi polaznici su bojali chibi figure iz linije UMS Agram te izrađivali dvorac od upcycle materijala.

    Click for enlarged picture

    Click for enlarged picture

    Click for enlarged picture

    Click for enlarged picture

    Click for enlarged picture

    Click for enlarged picture

    Click for enlarged picture

    Click for enlarged picture

    Više fotografija potražite na našim socijalnim mrežama!

    Click for enlarged picture

    " ["created"]=> string(19) "2025-10-13 09:20:17" ["modified"]=> string(19) "2025-10-13 09:20:17" } ["Member"]=> array(10) { ["id"]=> string(2) "64" ["group_id"]=> string(1) "1" ["first_name"]=> string(9) "Krunoslav" ["last_name"]=> string(8) "Belinić" ["first_name_mask"]=> string(9) "krunoslav" ["last_name_mask"]=> string(7) "belinic" ["username"]=> string(5) "Kruno" ["password"]=> string(40) "eb3fda45fbec0258e90d809803b10491c548b22f" ["born"]=> string(19) "2015-01-18 09:19:00" ["created"]=> string(19) "2015-01-18 09:20:39" } }
    Krunoslav Belinić, 13th October 2025
  • Gaslands - Tutorial II
              array(2) {
      ["Article"]=>
      array(10) {
        ["id"]=>
        string(3) "475"
        ["member_id"]=>
        string(2) "35"
        ["title_eng"]=>
        string(22) "Gaslands - Tutorial II"
        ["title_hrv"]=>
        string(37) "Gaslands - bojanje autića - nastavak"
        ["mask_eng"]=>
        string(22) "gaslands_-_tutorial_ii"
        ["mask_hrv"]=>
        string(36) "gaslands_-_bojanje_autica_-_nastavak"
        ["content_eng"]=>
        string(5350) "

    Click for enlarged picture

    In this article I will briefly describe how I painted another set of three cars for Gaslands. Same as last time, I started with a black undercoat.

    Click for enlarged picture

    As I decided to keep the colour of the vehicles matt black, I left it at that and proceeded to paint the windshields. Using much the same method I used for the yellow crew, I applied the chosen paint scheme. Unlike blue windshields with the yellow crew, here I decided to use the yellow/red combo.

    Click for enlarged picture

    I then added chrome.

    Click for enlarged picture

    In the end, I added metallic details such as guns etc.

    Click for enlarged picture

    It was time to add the decals. I first painted all the surfaces with gloss varnish. Then I added the decals and after they set properly, I covered everything with Ultra Matt Varnish..

    Click for enlarged picture

    And thus ended the painting process.

    Click for enlarged picture

    GALLERY OF THE TWO FINISHED CREWS

    Click for enlarged picture

    Click for enlarged picture

    Click for enlarged picture

    Click for enlarged picture

    Click for enlarged picture

    Click for enlarged picture

    Click for enlarged picture

    " ["content_hrv"]=> string(5419) "

    Click for enlarged picture

    U ovom ću  članku opisati kako sam obojao drugi set od tri autića za Gaslands demo partije. Kao i prošli puta, krenuo sam s crnim undercoatom. 

    Click for enlarged picture

    S obzirom da sam odlučio da ovaj crew bude mat crn, farbanje karoserija sam tu prekinuo i počeo sam sa staklima. Slično kao i prošli put, koristio sam sličnu shemu, ali u drugim bojama. Za razliku od plavih refleksija na žutim autima, na crnima sam se odlučio za žuto/crvenu kombinaciju. 

    Click for enlarged picture

    Dodao sam krom.

    Click for enlarged picture

    I na kraju dodao metalne dijelove poput oružja.

    Click for enlarged picture

    Na ovim autima, odlučio sam dodati i naljepnice. Prvo sam na površine s naljepnicama stavio gloss lak. Potom sam postavio naljepnicce i nakon što su se dobro osušile sam te iste površine prekrio mat lakom. 

    Click for enlarged picture

    Time sam završio posao...

    Click for enlarged picture

    GALERIJA ZAVRŠENIH RADOVA!

    Click for enlarged picture

    Click for enlarged picture

    Click for enlarged picture

    Click for enlarged picture

    Click for enlarged picture

    Click for enlarged picture

    Click for enlarged picture

    " ["created"]=> string(19) "2025-10-13 07:21:57" ["modified"]=> string(19) "2025-10-13 07:21:57" } ["Member"]=> array(10) { ["id"]=> string(2) "35" ["group_id"]=> string(1) "1" ["first_name"]=> string(5) "Marko" ["last_name"]=> string(9) "Paunović" ["first_name_mask"]=> string(5) "marko" ["last_name_mask"]=> string(8) "paunovic" ["username"]=> string(5) "marko" ["password"]=> string(40) "3bd37b326d19d1880d3b93a4b32e8fb3a90fa122" ["born"]=> string(19) "2033-03-07 20:35:00" ["created"]=> string(19) "2009-06-02 20:37:03" } }
    Marko Paunović, 13th October 2025
  • GASLANDS - tutorial
              array(2) {
      ["Article"]=>
      array(10) {
        ["id"]=>
        string(3) "474"
        ["member_id"]=>
        string(2) "35"
        ["title_eng"]=>
        string(19) "GASLANDS - tutorial"
        ["title_hrv"]=>
        string(43) "GASLANDS - bojanje autića za postapoc igru"
        ["mask_eng"]=>
        string(19) "gaslands_-_tutorial"
        ["mask_hrv"]=>
        string(42) "gaslands_-_bojanje_autica_za_postapoc_igru"
        ["content_eng"]=>
        string(2790) "

    Click for enlarged picture

    In this article I will briefly describe how I painted a set of three cars for Gaslands. I started with a black undercoat and then applied a silver (Leadbelcher) spray as the base color.

    Click for enlarged picture

    Then I used the Rust effect from Dirty Down. Once the effect was dry, I sprayed the cars with a clear matte varnish to protect the layer of rust (which is activated when exposed to moisture). After the spray dried, I applied the Scratches and Heavy Chipping effect from Ammo by Mig Jimenez with a brush. After about fifteen minutes of drying, I sprayed the cars in yellow and let it dry for about 15 minutes. I used a brush to apply water over the cars and used a stiff brush, wooden skewer and cotton swab to remove the excess paint that was activated due to the Scratches and Heavy Chipping effects.

    Click for enlarged picture

    Then came the painting. First I covered all the details that would not be yellow in black. Then I used blue to draw out the reflections on the glass. Added the metal details (engines and weapons). And finally added the chrome effects (using GSW paint). For the very end I left the engine shine effects.

    Click for enlarged picture

    The painting of the cars for Gaslands is now complete.

    Click for enlarged picture

    " ["content_hrv"]=> string(2794) "

    Click for enlarged picture

    U ovom članku ću ukratko opisati kako sam bojao set od tri autića za Gaslands. Krenuo sam sa crnim undercoatom na kojeg sam stavio srebrni (Leadbelcher) sprej kao osnovnu boju.

    Click for enlarged picture

    Potom sam koristio Rust efekt od tvrtke Dirty Down. Kada se posušio efekt, autiće sam posprejao bezbojnim mat lakom da zaštitim sloj hrđe (koja se aktivira u doticaju sa vlagom). Nakon što se sprej osušio, kistom sam nanio Scratches i Heavy Chipping efekt od Ammo by Mig Jimenez. Nakon petnaestak minuta sušenja, autiće sam posprejao u žuto i ostavio da se osuši cca 15 minuta. Kistom sam premazao vodu preko autića i tvrdim kistom, drvenim ražnjićem i štapićem za uši sam uklonio višak boje koji se aktivirao zbog Scratches i Heavy Chipping efekata.

    Click for enlarged picture

    Zatim je uslijedilo bojanje. Prvo sve detalje koji neće biti žuti sam prekrio u crnu boju. Zatim sam izvukao plavom bojom refleksije na staklima. Dodao metalne detalje (motori i oružja). I na kraju dodao krom efekte (koristeći boju tvrtke GSW). Za sami kraj ostavio sam efekte sjaja motora.

    Click for enlarged picture

    TIme je završeno bojanje autića za Gaslands.

    Click for enlarged picture

    " ["created"]=> string(19) "2025-10-02 07:39:25" ["modified"]=> string(19) "2025-10-02 07:39:25" } ["Member"]=> array(10) { ["id"]=> string(2) "35" ["group_id"]=> string(1) "1" ["first_name"]=> string(5) "Marko" ["last_name"]=> string(9) "Paunović" ["first_name_mask"]=> string(5) "marko" ["last_name_mask"]=> string(8) "paunovic" ["username"]=> string(5) "marko" ["password"]=> string(40) "3bd37b326d19d1880d3b93a4b32e8fb3a90fa122" ["born"]=> string(19) "2033-03-07 20:35:00" ["created"]=> string(19) "2009-06-02 20:37:03" } }
    Marko Paunović, 2nd October 2025
  • UMS Agram at CK2025
              array(2) {
      ["Article"]=>
      array(10) {
        ["id"]=>
        string(3) "473"
        ["member_id"]=>
        string(2) "64"
        ["title_eng"]=>
        string(19) "UMS Agram at CK2025"
        ["title_hrv"]=>
        string(42) "UMS Agram na CK2025 u Stubičkim toplicama"
        ["mask_eng"]=>
        string(19) "ums_agram_at_ck2025"
        ["mask_hrv"]=>
        string(41) "ums_agram_na_ck2025_u_stubickim_toplicama"
        ["content_eng"]=>
        string(2737) "

    Click for enlarged picture

    Click for enlarged picture

    Click for enlarged picture

    Click for enlarged picture

    Click for enlarged picture

    Click for enlarged picture

    Click for enlarged picture

    Click for enlarged picture

    For more photos check our social media!

    " ["content_hrv"]=> string(2864) "

    U subotu, 27.9.2025. naši članovi su nastupili na CK2025 u Stubičkim toplicama.

    Click for enlarged picture

    Click for enlarged picture

    Click for enlarged picture

    Click for enlarged picture

    Click for enlarged picture

    Click for enlarged picture

    Click for enlarged picture

    Click for enlarged picture

    Za više fotografija posjetite naše socijalne mreže!

    " ["created"]=> string(19) "2025-10-02 07:28:26" ["modified"]=> string(19) "2025-10-02 07:28:26" } ["Member"]=> array(10) { ["id"]=> string(2) "64" ["group_id"]=> string(1) "1" ["first_name"]=> string(9) "Krunoslav" ["last_name"]=> string(8) "Belinić" ["first_name_mask"]=> string(9) "krunoslav" ["last_name_mask"]=> string(7) "belinic" ["username"]=> string(5) "Kruno" ["password"]=> string(40) "eb3fda45fbec0258e90d809803b10491c548b22f" ["born"]=> string(19) "2015-01-18 09:19:00" ["created"]=> string(19) "2015-01-18 09:20:39" } }
    Krunoslav Belinić, 2nd October 2025
  • UMS Agram at Days of Technical Culture 2025
              array(2) {
      ["Article"]=>
      array(10) {
        ["id"]=>
        string(3) "472"
        ["member_id"]=>
        string(2) "96"
        ["title_eng"]=>
        string(43) "UMS Agram at Days of Technical Culture 2025"
        ["title_hrv"]=>
        string(41) "UMS Agram na 14. danima tehničke kulture"
        ["mask_eng"]=>
        string(43) "ums_agram_at_days_of_technical_culture_2025"
        ["mask_hrv"]=>
        string(39) "ums_agram_na_14_danima_tehnicke_kulture"
        ["content_eng"]=>
        string(6577) "

    Click for enlarged picture

    Click for enlarged picture

    Click for enlarged picture

    Click for enlarged picture

    Click for enlarged picture

    Click for enlarged picture

    Click for enlarged picture

    Click for enlarged picture

    Click for enlarged picture

    Click for enlarged picture

    Click for enlarged picture

    Click for enlarged picture

    Click for enlarged picture

    Click for enlarged picture

    Click for enlarged picture

    Click for enlarged picture

    Click for enlarged picture

    Click for enlarged picture

    Click for enlarged picture

    Click for enlarged picture

    For more photos check our social media!

    " ["content_hrv"]=> string(7407) "

    19. i 20.9. nastupili smo na XIV danima tehničke kulture u Kulturnom centru Dubrava. Dani je organizirala Zagrebačka zajednica tehničke kulture.

    Click for enlarged picture

    Click for enlarged picture

    Na Dane smo došli sa izložbenim prostorom i prostorom za radionice.

    Click for enlarged picture

    Click for enlarged picture

    Click for enlarged picture

    Click for enlarged picture

    Click for enlarged picture

    U sklopu nastupa organizirali smo:

    - predstavljanje Agramera, linije chibi minijatura 

    Click for enlarged picture

    Click for enlarged picture

    - promociju knjige Tabletop Scenery for Beginners 

    Click for enlarged picture

    A s ponosom objavljujemo i da smo za naš rad u 2024. primili godišnju nagradu tehničke kulture dr. Oton Kučera

    Click for enlarged picture

    Click for enlarged picture

    Click for enlarged picture

    Također smo organizirali i besplatne:

    - pokazne demonstracije minijaturističkih tehnika - sculpting i bojanje minijatura u petak 

    Click for enlarged picture

    Click for enlarged picture

    Click for enlarged picture

    Click for enlarged picture

    Click for enlarged picture

    - Back to Basics radionice bojanja minijatura za najmlađe u subotu

    Click for enlarged picture

    Click for enlarged picture

    Za više fotografija posjetite naše socijalne mreže!

    " ["created"]=> string(19) "2025-09-23 08:18:45" ["modified"]=> string(19) "2025-09-23 08:20:36" } ["Member"]=> array(10) { ["id"]=> string(2) "96" ["group_id"]=> string(1) "2" ["first_name"]=> string(6) "Antoni" ["last_name"]=> string(10) "Pastuović" ["first_name_mask"]=> string(6) "antoni" ["last_name_mask"]=> string(9) "pastuovic" ["username"]=> string(6) "antoni" ["password"]=> string(40) "5dfa823ee30df1936c1792d4c8348a4bcf4c64e2" ["born"]=> string(19) "2005-04-04 18:52:00" ["created"]=> string(19) "2019-04-04 18:53:09" } }
    Antoni Pastuović, 23th September 2025

All articles

Latest battle-reports

All battle-reports