
Wild West Minehead Entrance
Idea and planning
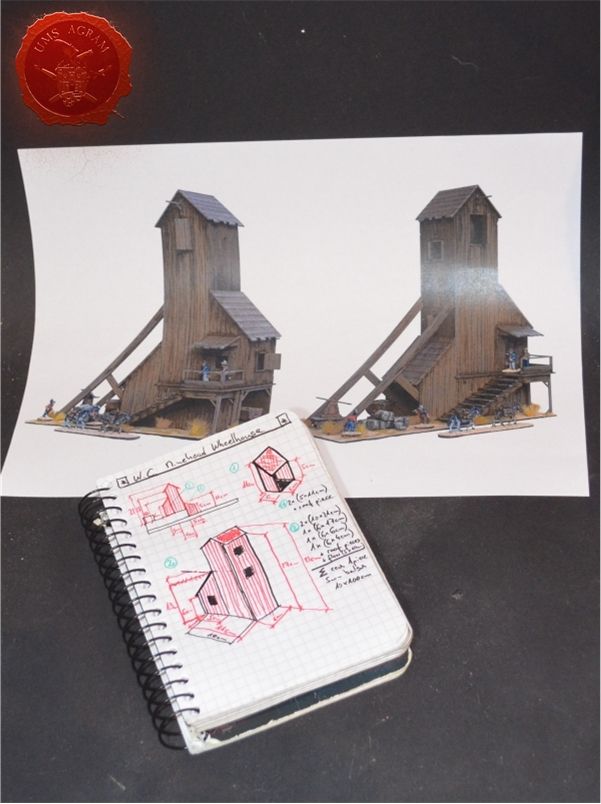
All who know me, know my mantra about how crucuial planning is in any bigger project. Since this is a more or less typical structure for Old west, I started my google search and instantly I found pictures of several types of wooden structures that I was going for. A bit down the order, after a couple of Lego versions, I managed to spot a tabletop terrain. Being curious I opened the link and was surprised that the link took me to Sarissa Precision site. I frequently go over their site and in fact my club owns a great number of their product. Sarissa Precision is an UK company from Derbyshire that designs and produces a range of laser cut products for retail and trade. They have a huge and ever growing range of laser cut buildings and accessories for wargamers and model makers including but not excluded to buildings, movement trays, bases, templates and tokens. They also manufacture a large number of products and components for other manufacturers and retailers and are happy to work with hobbyists. They are even kind enough to ship worldwide at affordable rates.
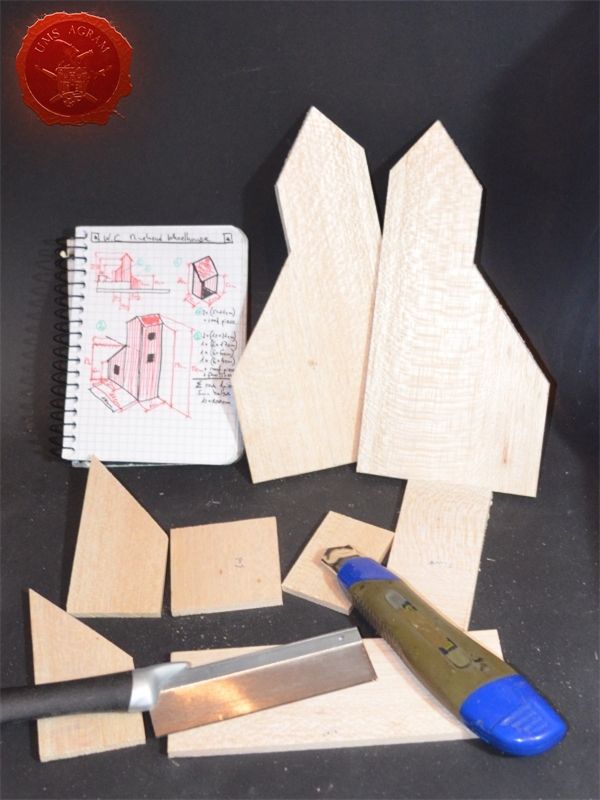
First thought I had was to use their Minehead Wheelhouse kit and build a small hill around it. The kit costs 22,5 GBP which is really a great price for a kit of this size (L290 x W110 x H290mm) and that features internal detail with a removable roof. However, I then reconsidered and thought it might be a really nice idea to make a sort of a comparison article. My intention was to find out how much it would cost (in materials) to copy the design of the structure and make one myself. I printed out the boxart pics I found on their internet store and using the rough measures provided (above) I quickly sketched my own version of the minehead. Once I had all the measures, I calculated how much material I would need to construct all the wall and roof segments. I was really surprised with the result as it turned out I „only“ needed one 5mm thick balsa plank (10x100cm) and some small pieces of 2mm thick balsa plank (about 30cm in length). A rough estimate of the cost revealed that to build this exact same structure, I would need only one tenth of the price of the kit. That said, I would need more time to build it than it would take me to just assemble the pre-cut terrain that comes from Sarissa Precision.
Materials and tools
After the rough sketch, I could make a definite list of materials and tools needed for this project. Those are as follows:
- one 2x2 mm linden slat
- one 5x5 mm linden slat
- roughly 30cm of 2 mm balsa wood (they come in 10 x 100 cm planks)
- roughly a full plank of 5mm balsa wood (they also come in 10 x 100 cm planks)
- a small piece of 5cm thick HD styrofoam
- an even smaller piece of 2cm thick HD styrofoam
- about 45x45 cm piece of 4mm thick MDF board
- superglue
- PVA glue
- DAS air drying clay
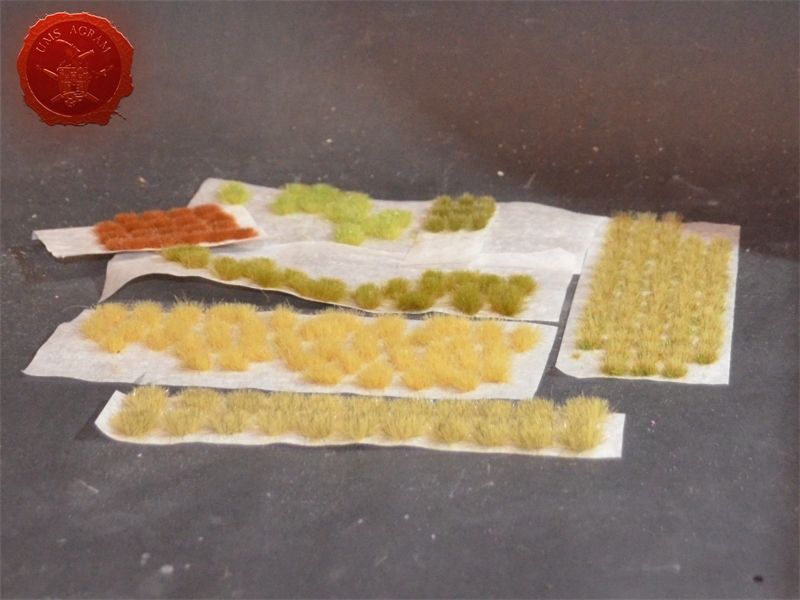
- gravel (four sizes)
- static grass / tufts
- pine trees
- sanding paper (1 sheet)
- thin card
- masking tape
- toothpicks
- some pins
- one piece of HO train set rails
The tools needed are:
- scalpel blade
- marker pen
- scissors
- modelling saw
- pin vice (or an electric mini drill)
- brushes – various sizes – for painting/washing and for drybrushing
- pliers and pincers
- icepick
- hot wire cutter
- electric jigsaw*
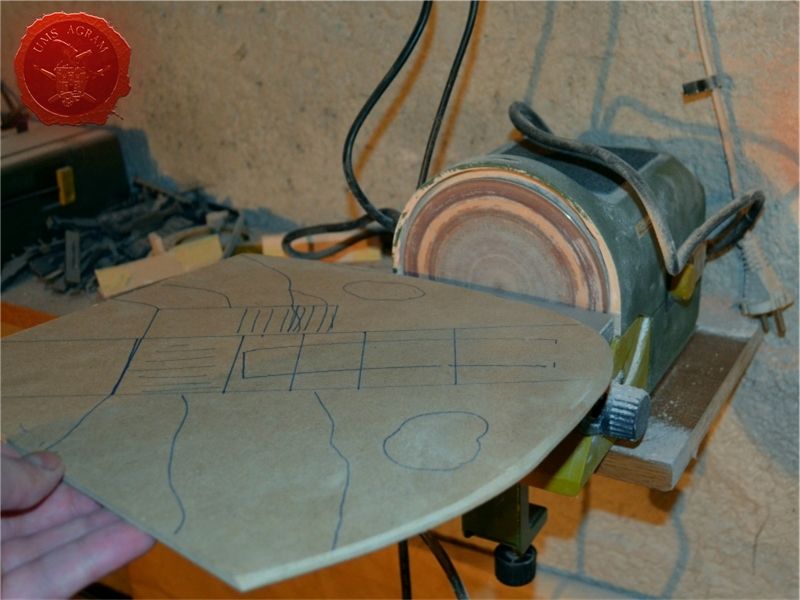
- electric disc sander*
- electric table mounted circular saw
* In order to speed up the process I will be using my Proxxon disc sander, jigsaw on the MDF to make the base. However, the base can be done with styrofoam only. In that case, if you don't have the jigsaw and disc sander.
Building the base
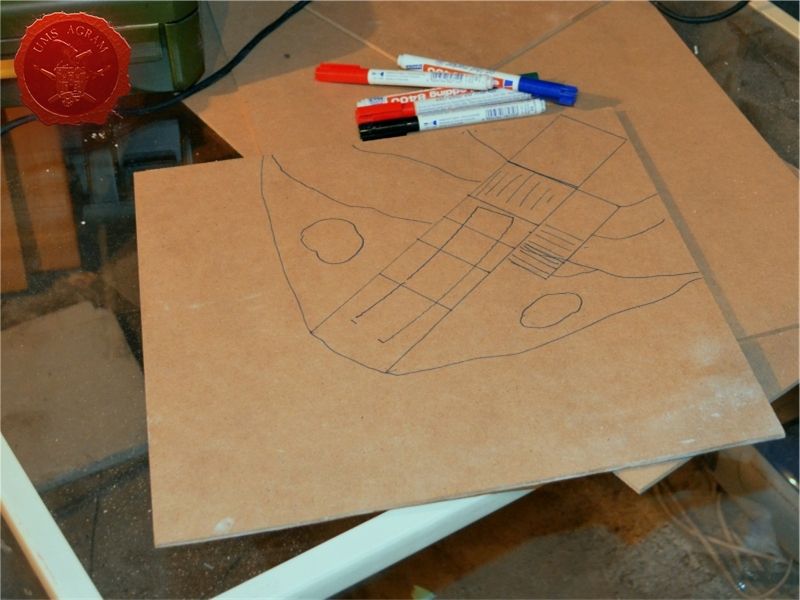
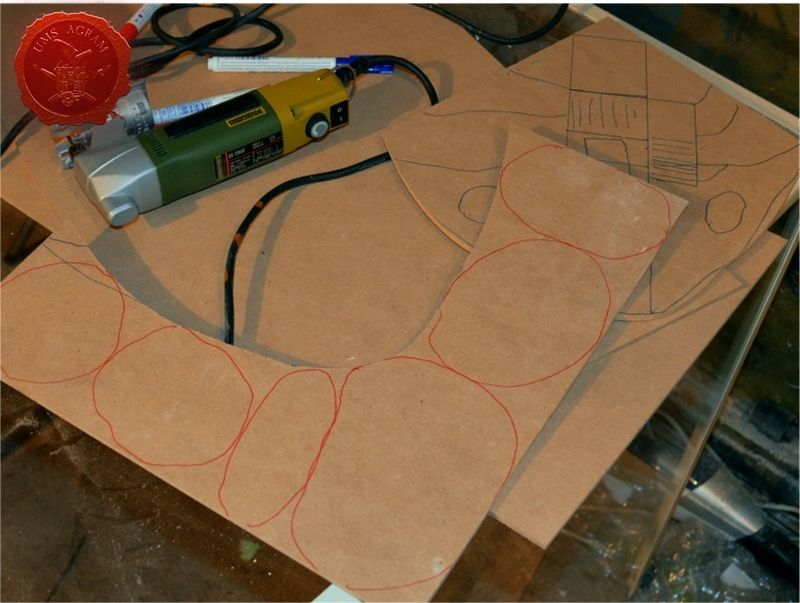
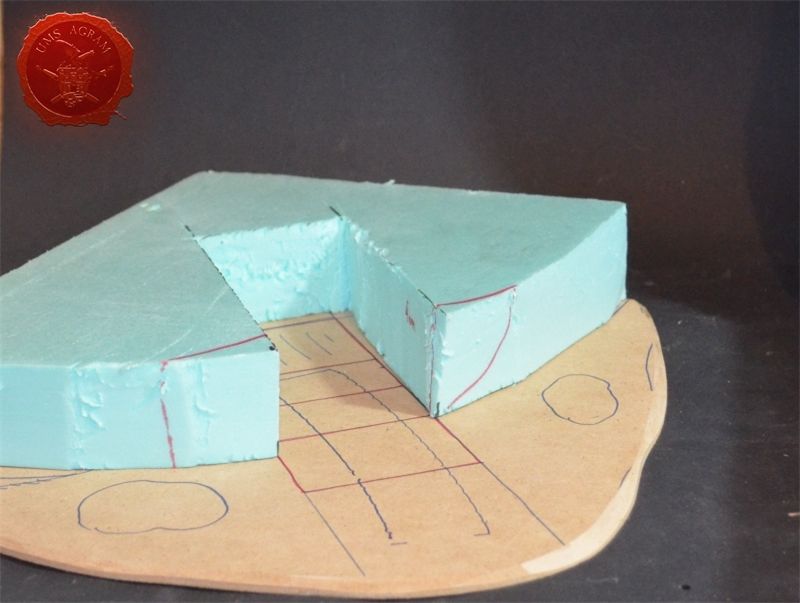
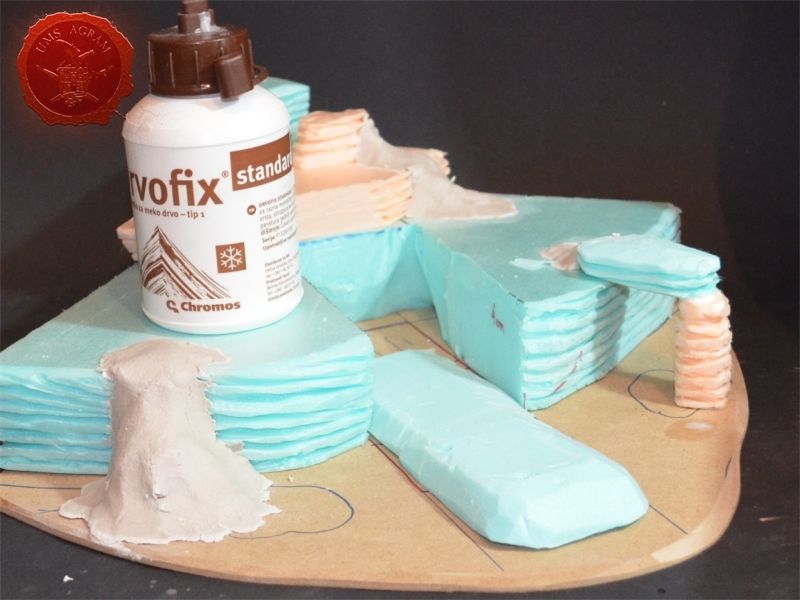
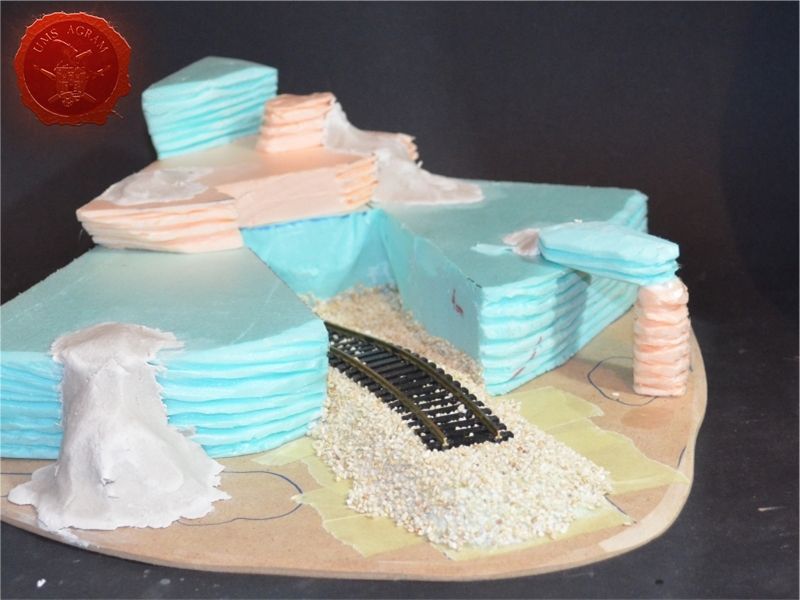
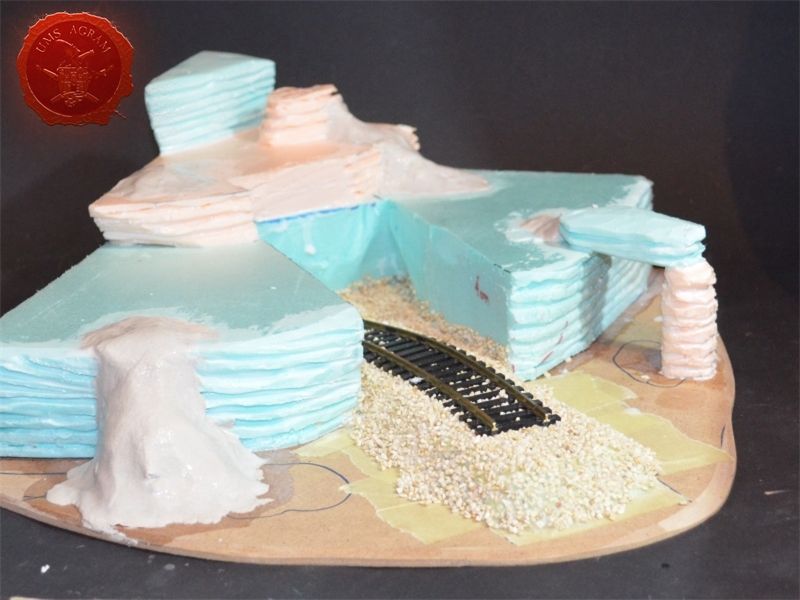
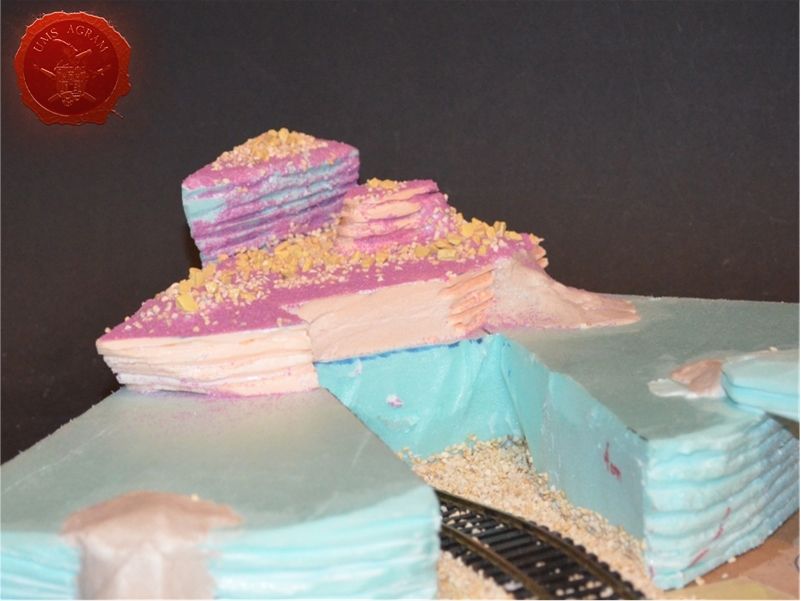
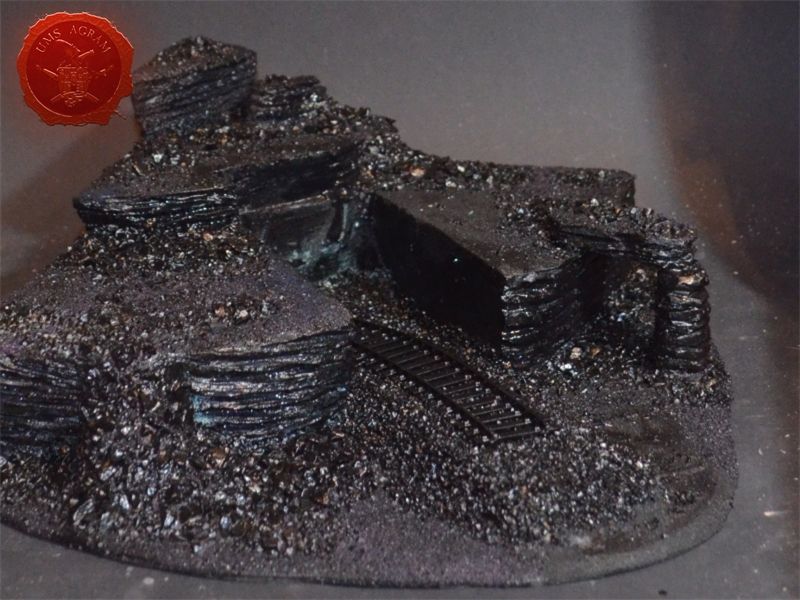
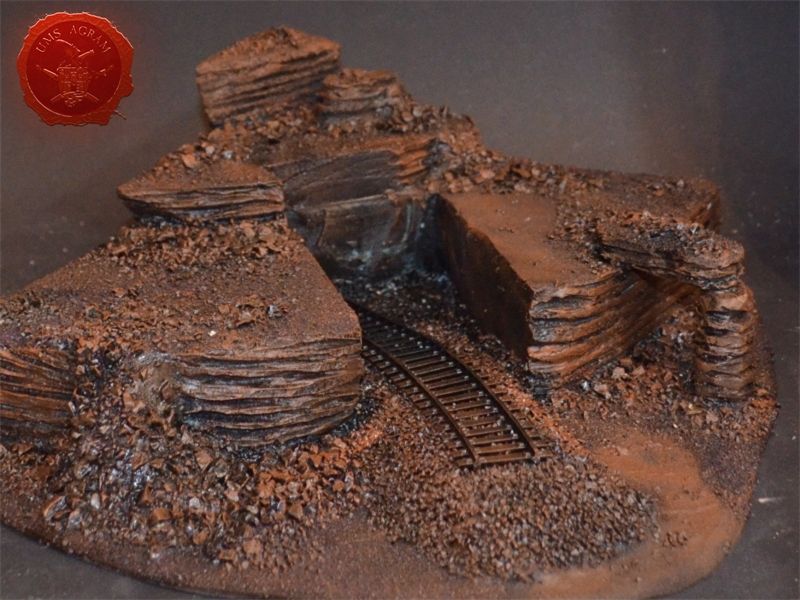
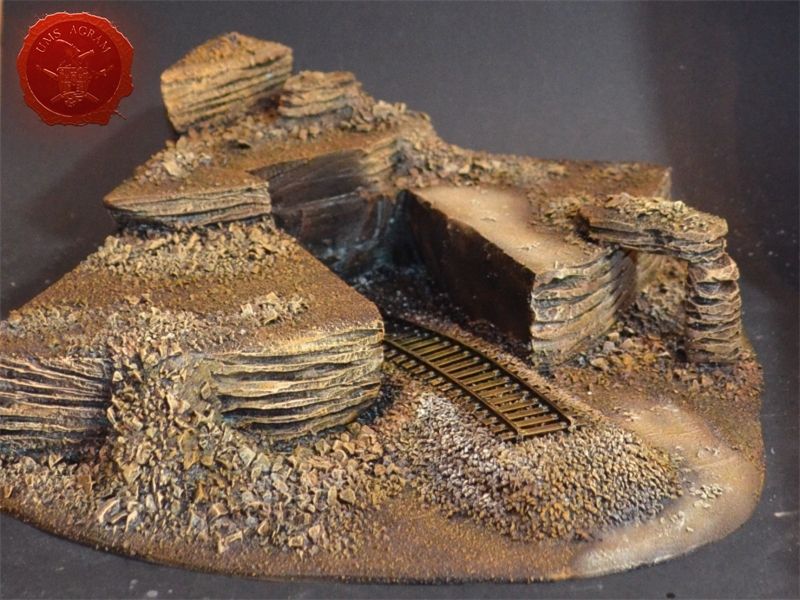
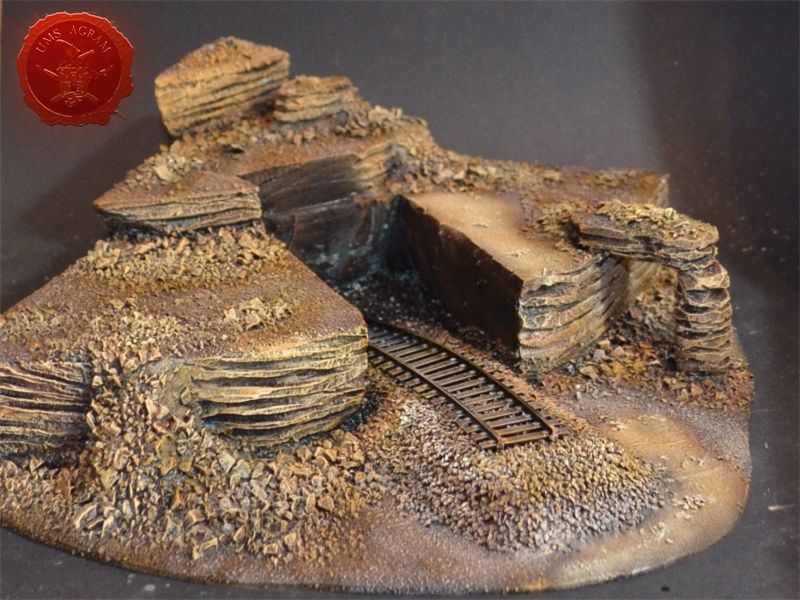
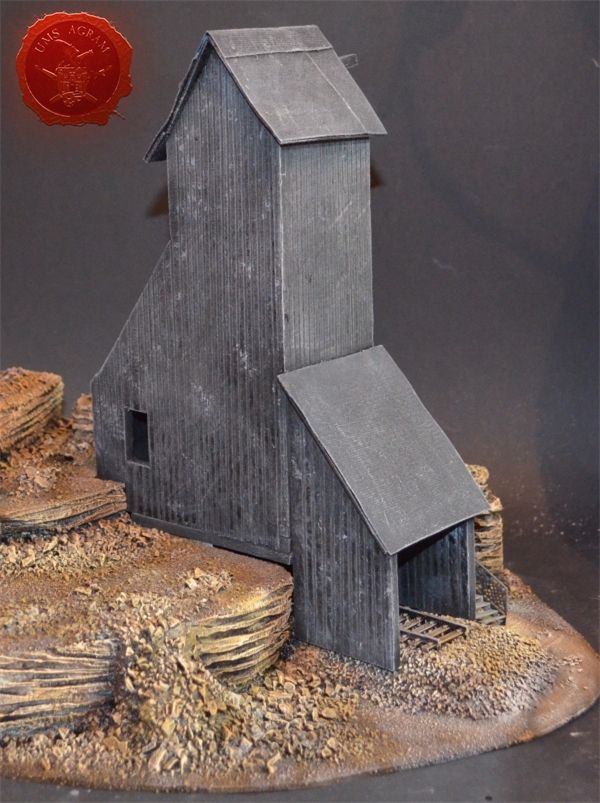
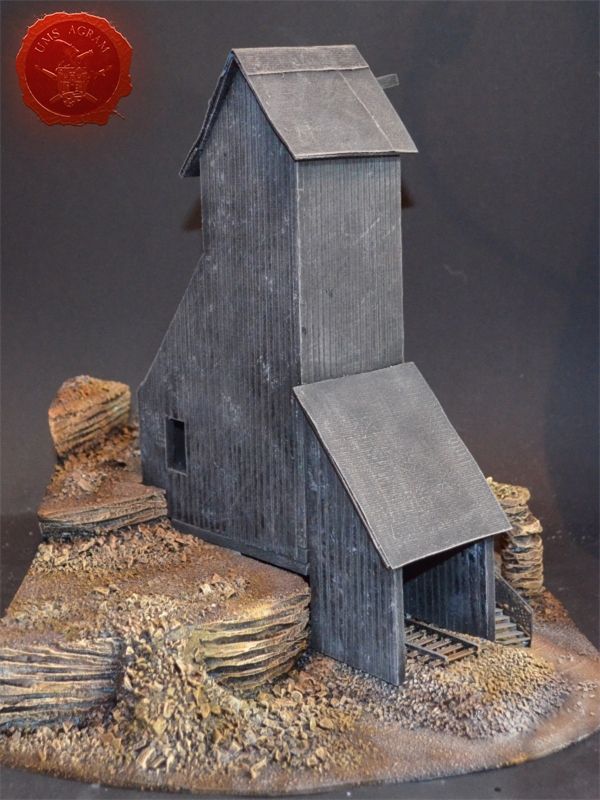
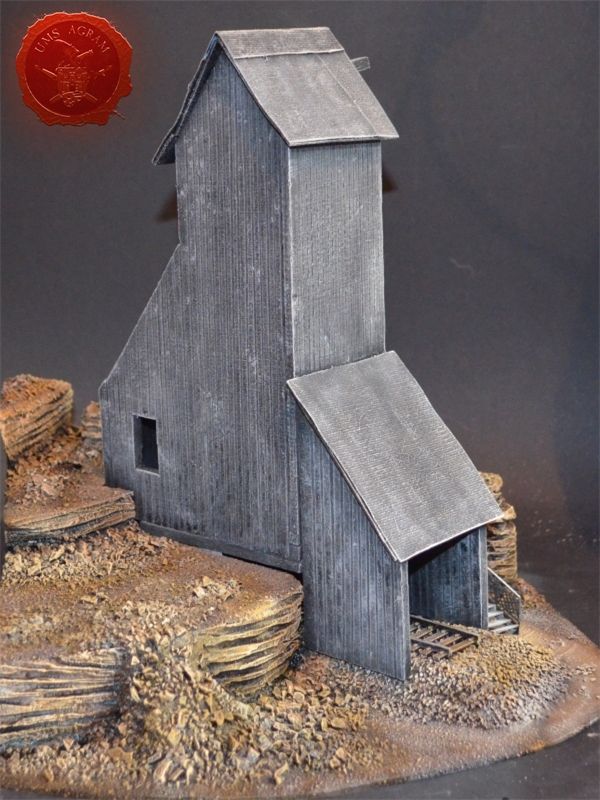
Using a marker pen I drew a rough outline of the base on the MDF board. Once I was satisfied with the layout, I proceeded to cut it with my jigsaw. The remaining piece of MDF, I stored for later use. They would come really handy as bases for smaller scatter terrain. When the cutting was done, I chamfered the circular edge using my disc sander. This will ensure the nice transition between the table and the base of the terrain. As mentioned before, if you do not own a disc sander, you can always make the base from HD styrofoam. Alternatively, you can sand the MDF using sanding paper. However, it will take a while but it is doable. Next, I drew the outline of the hillside on top side of the 5cm thick HD styrofoam. I also added a crevice that will house the mine itself. After drawing, I cut the styrofoam carefully with my scalpel blade. Remember to always use a really sharp blade when cutting styrofoam and bear in mind that the foam dulls the blades rather quickly so regular change of the blades is unfortunately necessary.
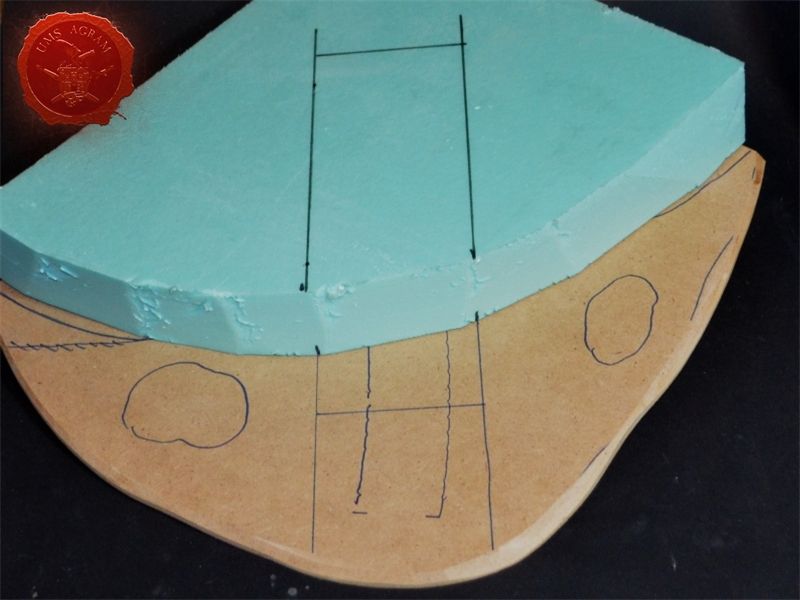
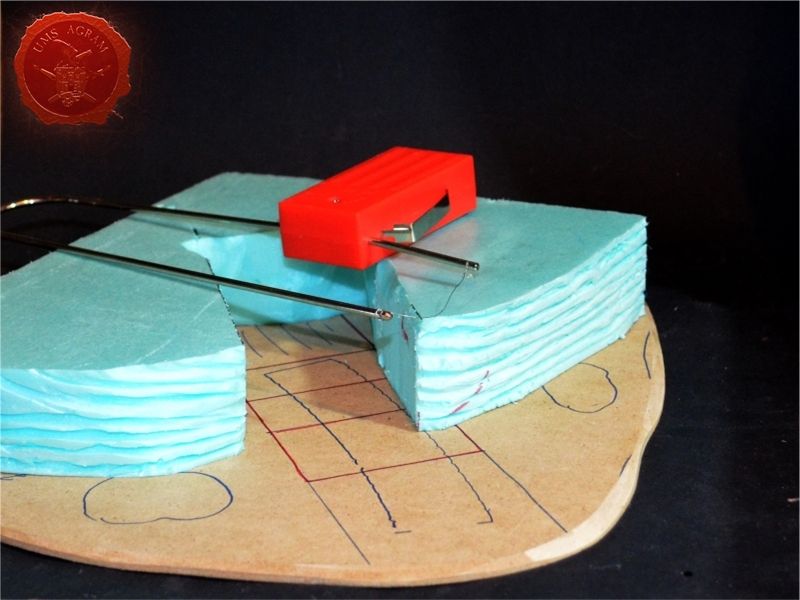
When I was finally happy with the basic shape of the hill, same as last time I used my hot wire cutter to model the vertical surfaces. I again used my cheapest wire cutter, powered by two AA batteries. The electricity from the batteries heats up the wire that then melts the styrofoam performing a perfect straight cut. However, as it heats the wire elongates so you should take into account that fact when fixing the wire to the cutter. If the wire is too long, it will still perform the job, however it won't be as handy and you (like me) will have to stoop to some really fiddly and strange handling of the device in order to get a nice cut. Using the same method (varying between 5cm and 2cm thick HD styrofoam) I built some more levels to my hillside and engraved the errosion patterns with the hot wire cutter.


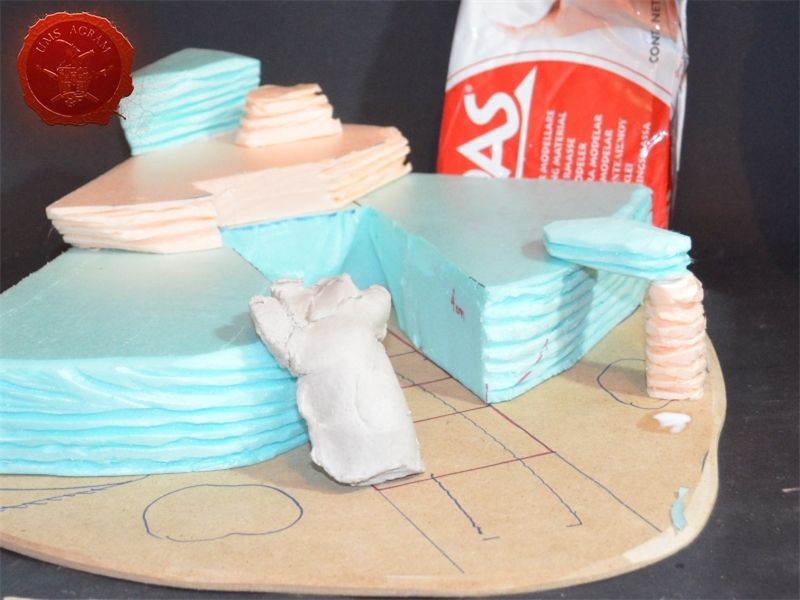
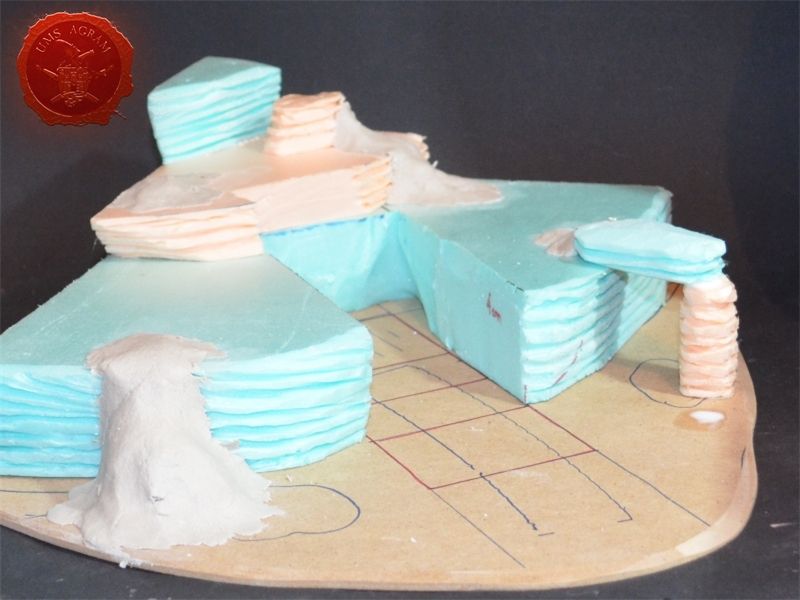
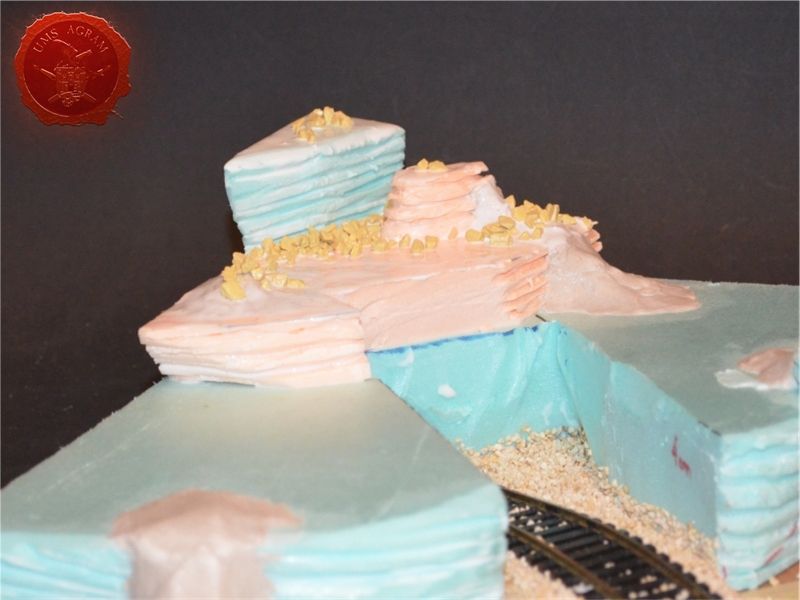
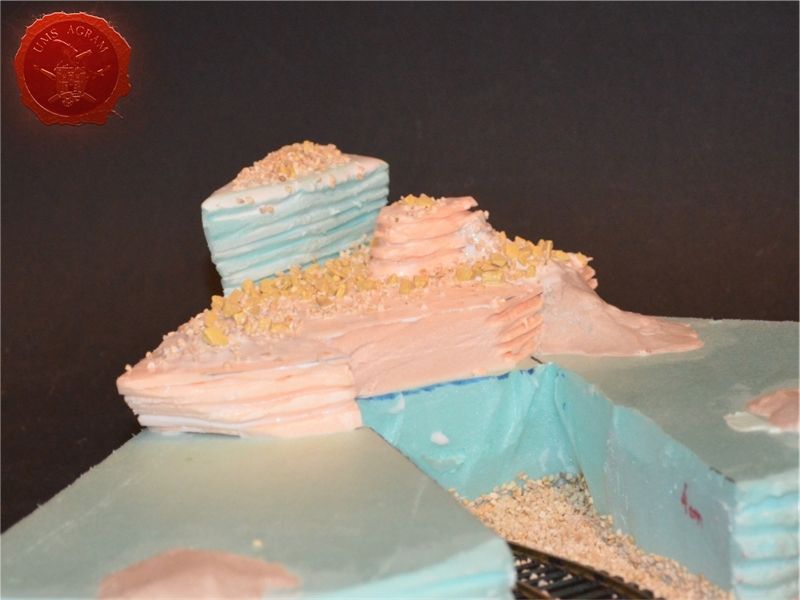
When the hillside was built, it still looked a bit dull and plain so I decided to make some escarpments along the sides of the cliffs. In order to do so, I needed to build up the volume there. I could have done it using HD styrofoam once again, but I opted against it, choosing to sculpt the escarpments using DAS air drying clay. DAS comes in two versions, white and terracota. Both are equally good, don't crack during the curing period and are reasonably good for sculpting. (Note: you won't be able to sculpt your minis with DAS, but you will be able to model brick or stone walls, cobbled streets and whatnot.) I spread some DAS in several places throughout the base and when it was partly dry, I used a slightly watered down PVA glue just to fix it better to the base.
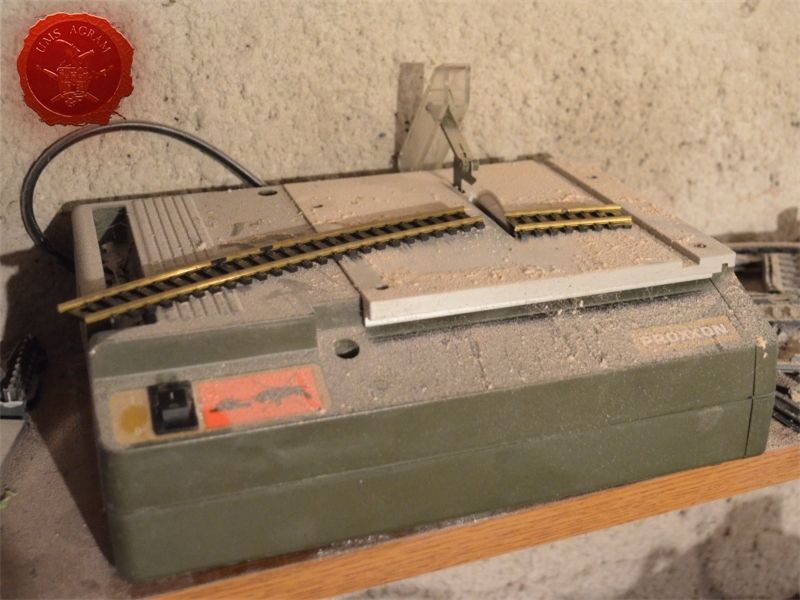
Before applying the texture, there was one thing left to do. I needed to make the embankment for the mine rail system. Again I turned to HD styrofoam and cut a slightly curving piece that was slanted inwards so the rails would appear to go down into the mine. I glued the piece with PVA glue. However, as I was in a rush, I decided to use some masking tape to better and faster stick it to the ground. Then I returned to my garage and using my Proxxon table mounted circular saw, I cut the curving piece of HO railings to size. If you don't own a circular saw, same can be done using a circular bit on your Dremmel. Note: be careful when using it as the sparks will fly and they can cause harm to your eyes so eye protection is a must. In case you don't own any electrical tools, you can cut it using a modelling saw. However, it will take time and it will probably dull your blade a bit, breaking a couple of teeth. When the cutting was done, I bent the rails to follow the curvature of the embankment. It did take a couple of tries.
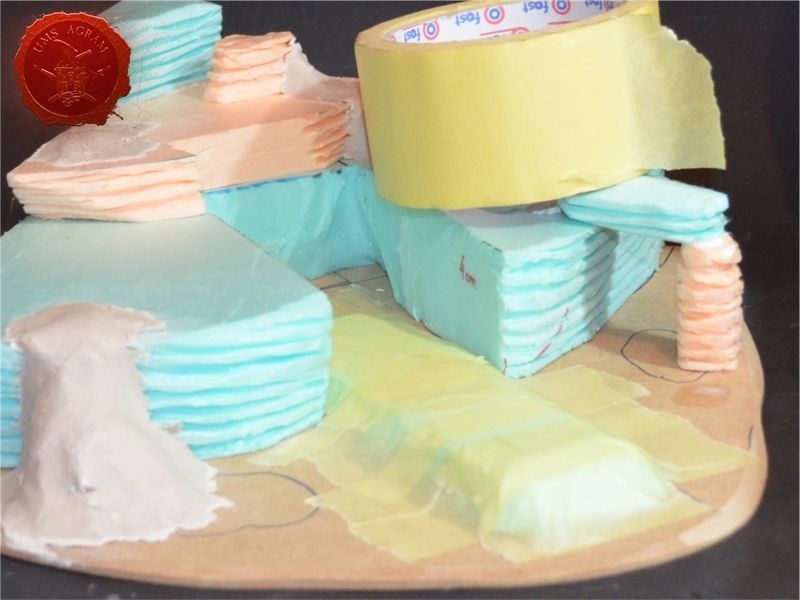
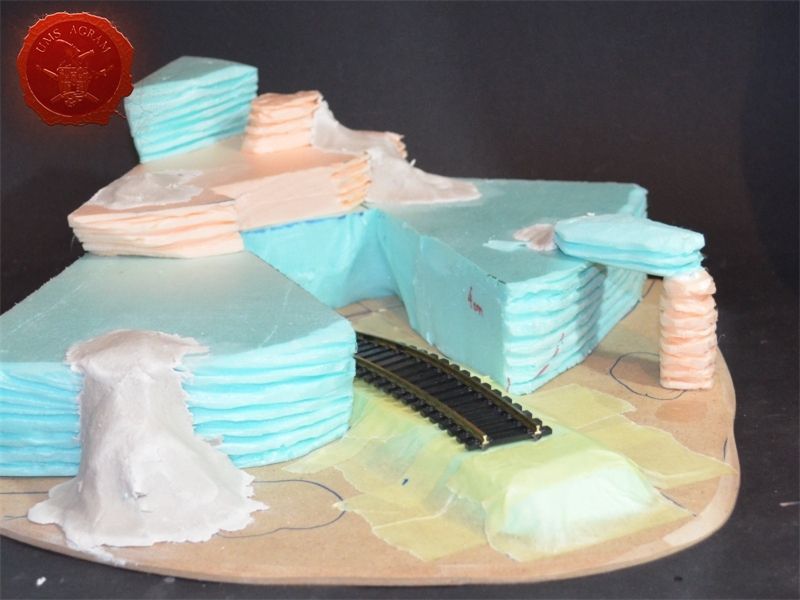
Finally we come to the stage of adding the texture. First, I decided to put the rails in place. I covered the embankment with pure PVA glue (as I needed the rails to be glued properly) and I carefully placed the rails positioning them so they snuggly fit the embankment. To make the joint stick immediately, I put several blobs of superglue on each end of the rails. I could do that because I covered the HD styrofoam with masking tape. If there was no masking tape there, this method wouldn't work as the superglue would dissolve the styrofoam beneath. When the rails were fixed, I sprinkled the medium sized gravel over it making sure the texture covered every surface equally. Then it was time to add the texture to the rest of the base. I did the whole base in several segments (each level at a time). As always, I covered the surfaces with diluted PVA glue and started adding the gravel. I started with the biggest granulate and end with the smallest. I used four different sizes, from small pebbles to chinchilla sand. The larger pebbles and gravel I placed strategicly around the base to form some clutter and especially on the escarpment. The two smallest granulates were freely dispersed throughout the terrain making sure I get even coverage throughout and no area is left without texture. Around the places leading up to the entrance of the building, I used only smallest grain sand (for chinchillas).


Making the structure
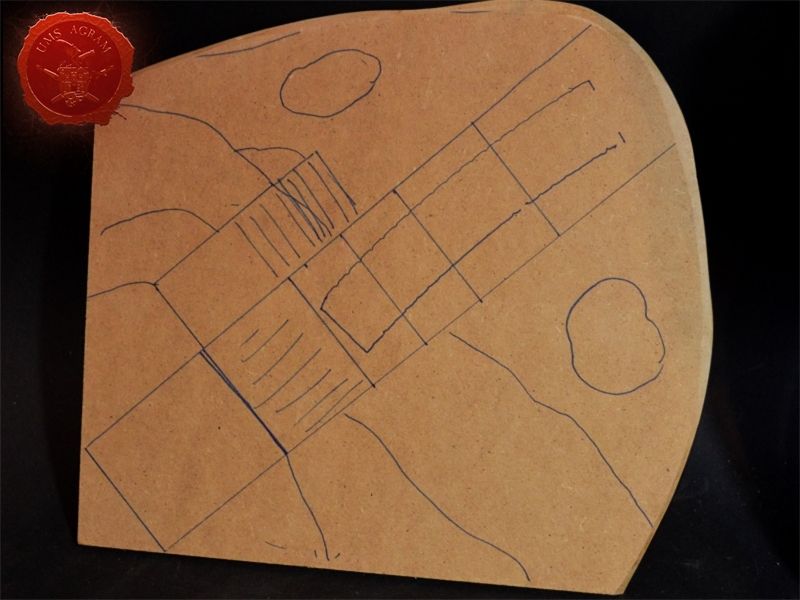
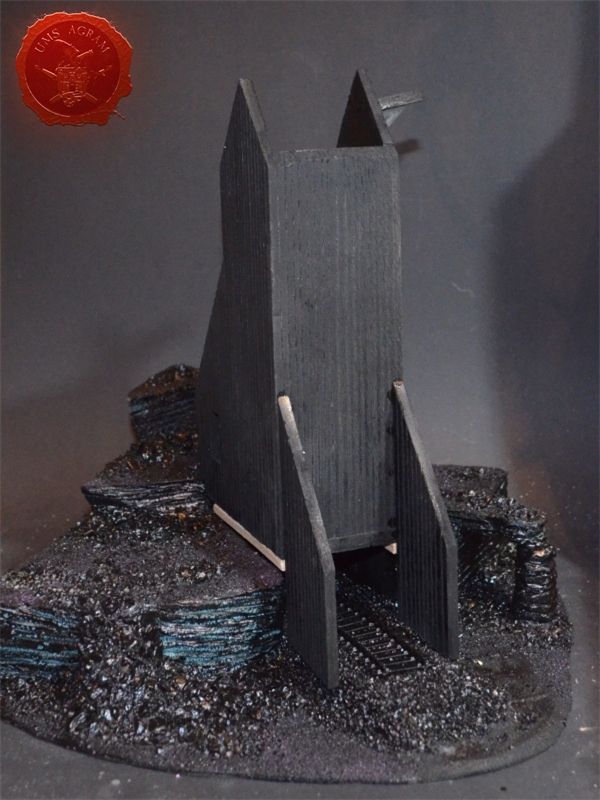
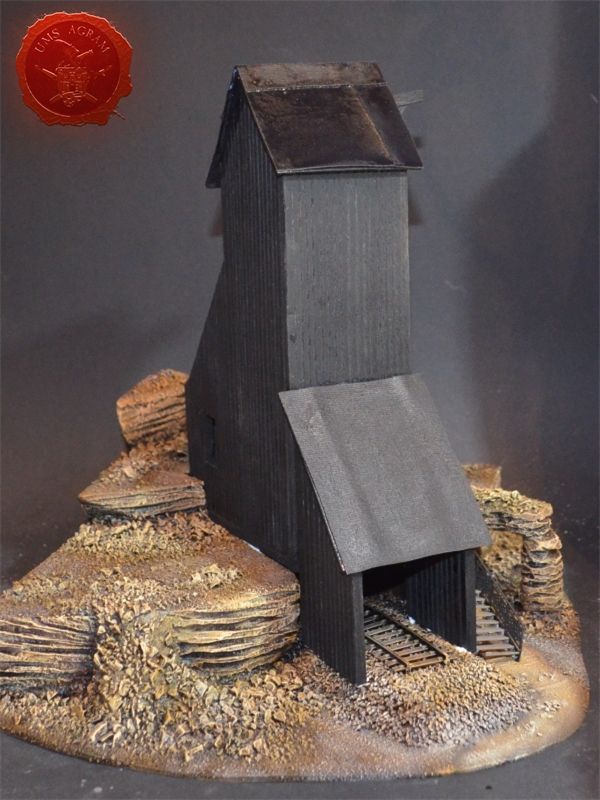
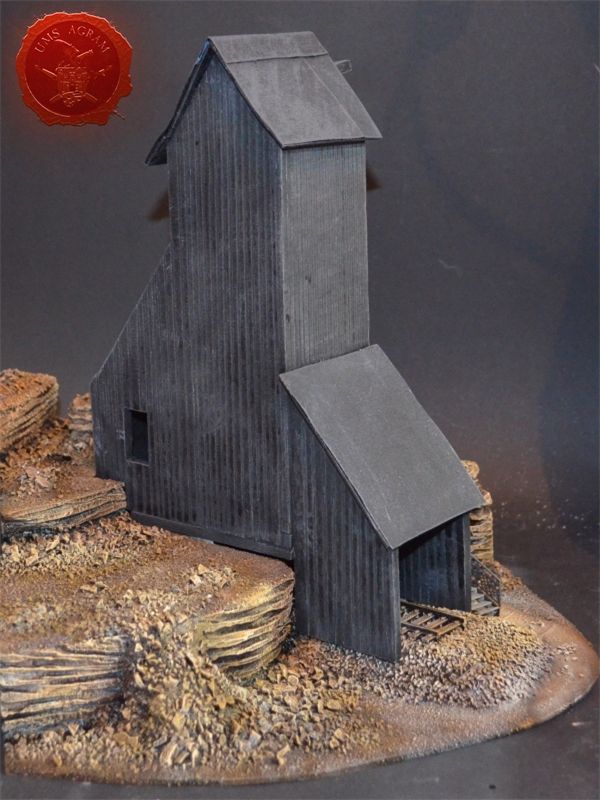
While the texture was drying, I proceeded to make the minehead entrance/wheelhouse structure. I decided to go for the easiest and the fastest method of building the structure. Unlike the old west church where I first made the wooden frame and then glued each plank separately, here I opted to make the walls from a single piece of 5mm balsa wood. Balsa of such thickness is sturdy enough to withstand gaming abuse without any damage/breakage. As with MDF and styrofoam bases, I first drew the outlines of each wall on the balsa plank using my marker pen. Then I carefully cut each wall. I used my modellers saw for cuts against the grain (perpendicular to it) and used the scalpel blade for cuts going with the grain. When every wall segment was cut, I used an icepick to carve each individual plank both on the inner and the outer side of the wall.

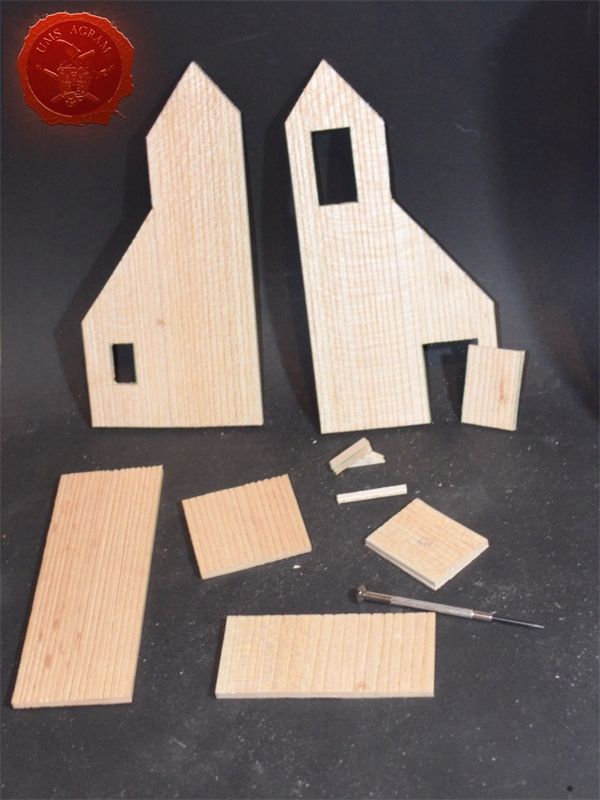
Using superglue, I glued all the wall segments into my structure. To make the roof structure, I used 2mm thick balsa wood. The roof of the small hut in the back (with the door) was intentionally left unglued so you can actually play inside the building. Once the roof structure was made, I used the same material I used on the church to make the roof – sanding paper cut to size. I just love the texture it has. Once everything was finished, I took both the structure and the base to my garage for a quick sprey of undercoat. Remember to always sprey in a well ventilated area! When the undercoat was dry, I first dryfitted the building to the base, closed the gaps with some balsa planks and applied with a large brush a coat of black colour to the places the sprey didn't reach.

Painting
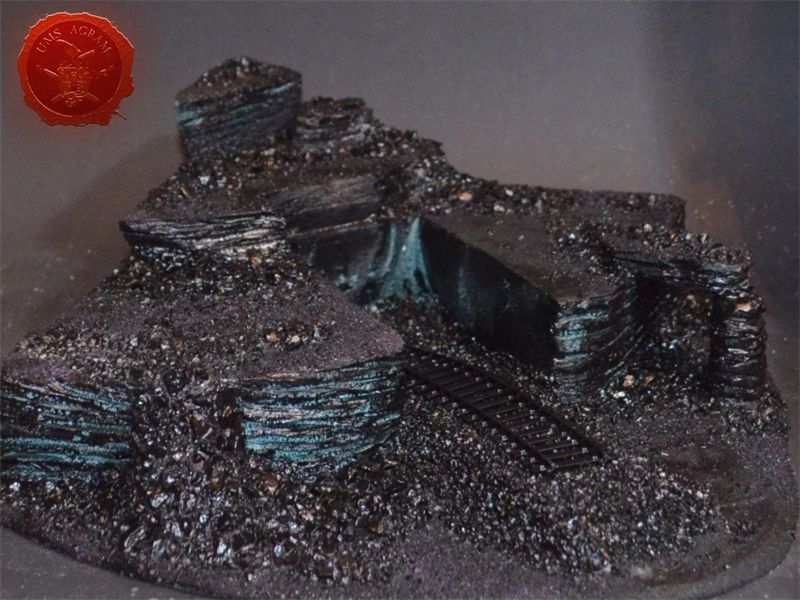
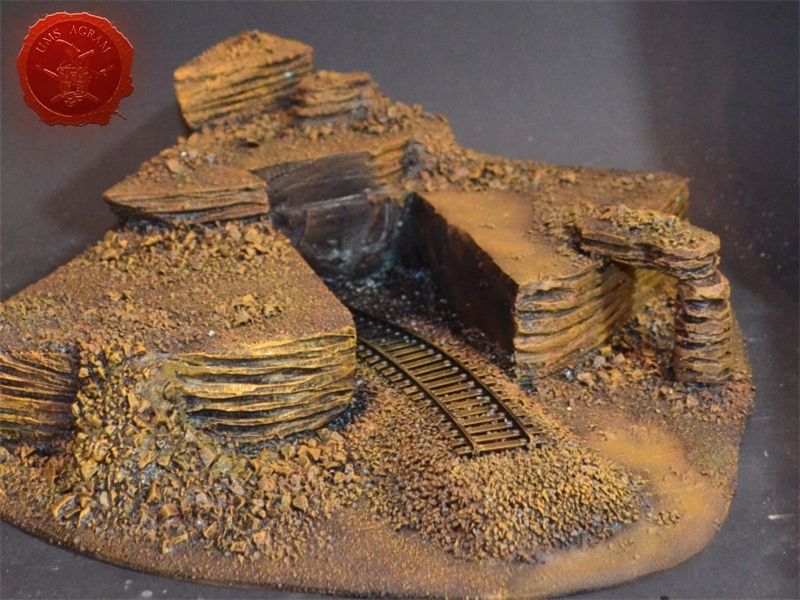
When the undercoat was dry, it was time to paint the terrain. Normally, I would have glued the building to the base at this point. However, I wanted to be able to paint the terrain inside the mine so I left the two parts separate. I started painting the base first. Wanting all my terrain to fit one theme (and consequently one tabletop) it was only natural I use the same colours and colour scheme as on the earlier terrain. Therefore once again I used Pebeo Deco color range. I used Brown (29) for the basecoat and continued drybrushing with Ocre (51). Lighter shades were done with a 50:50 mixture of Ocre (51) and White (41). The final highlight was done with Antique White (69).
With the base painted, I could now attach the building to it. I used PVA glue to glue it in place and once it was dry, I started painting the structure. The building has two different surfaces and consequently textures – roof and wooden walls. I proceeded to paint the wooden walls by drybrushing first using a 50:50 mixture of Black (55) and Grey (54). Next layer was pure Grey (54) and the finishing highlight was Ash Brown (70). I was not quite satisfied with the result, so I added another highlight of pure White (41). The roof was painted first with a mixture of Black (55) and Grey (54) and then a mixture of Grey (54) and Antique White (69) finishing with almost a pure coat of Antique White (69).

Vegetation
After the painting, it was time to add the vegetation to the base. First up, I decided to plant some pine trees. I used Ziterdes ones that come in a big pack of 20 (or 25, not sure). They come on long shafts and in several sizes and heights. In order to glue them in place, I first had to cut their round bases as they got in the way. I also added metal pins to the pine trees. The easiest method of pinning metal pins to the plastic trunks of the trees is to heat the metal pin using a candle and just stick it into the trunk. The heat will melt the plastic locally and as the pin goes into the trunk the heat dissipates and once the pin is cool it will become lodged into the trunk without any need to glue it. The pins in the trees that were intended to be glued to the styrofoam base were left longer than the pins in the trees meant to be glued on the MDF base. Also, I used a pinvice to make the hole in the MDF base to accommodate the pins. I glued the trees using both PVA and super glue.


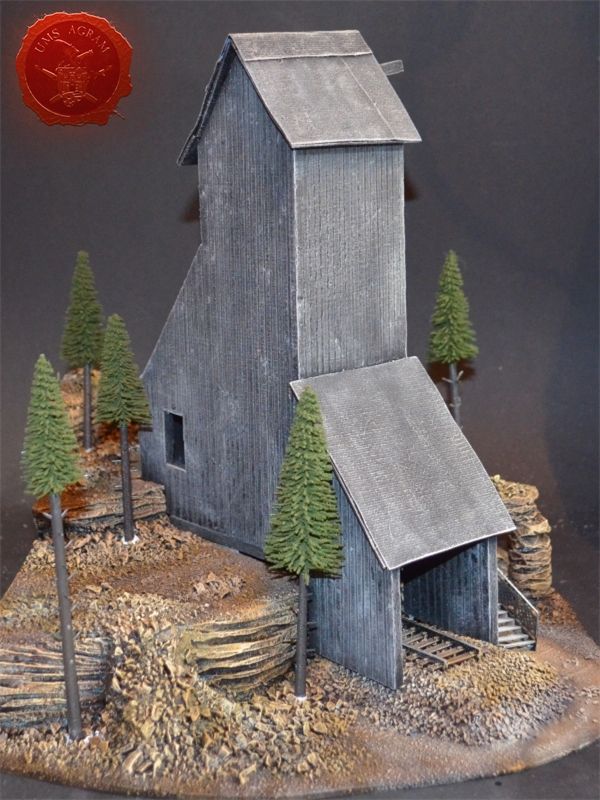
With the trees in place, I could now add the static grass. I made a mixture using several green, brown, yellow and black shades of static grass and when I was satisfied with the end product, I glued it in random patches throughout the base. One thing I made sure of is that I put static grass over any and all of the remaining holes where the wooden structure met the base in order to hide the unintentional mistake. Once the static grass was in place, I applied several shades of different tufts. Again, as in the former articles, I used tufts made by a company called Gamer's Grass.

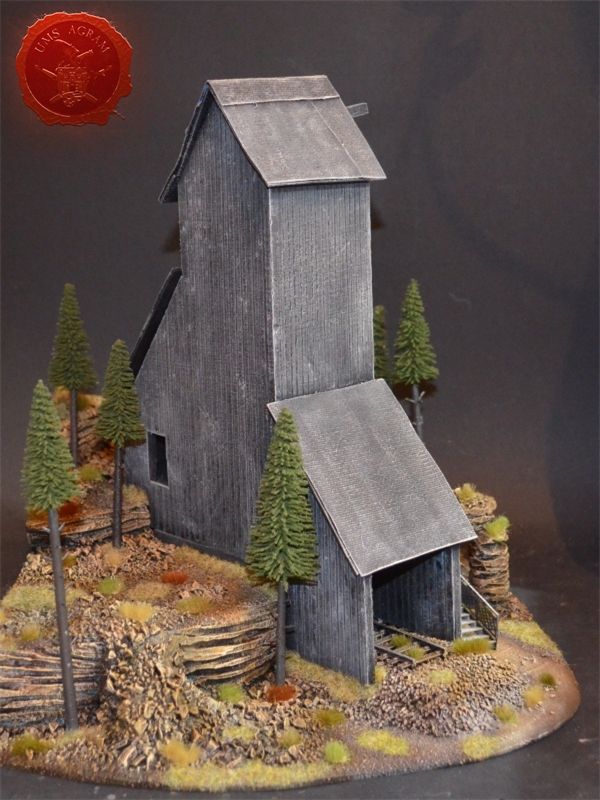
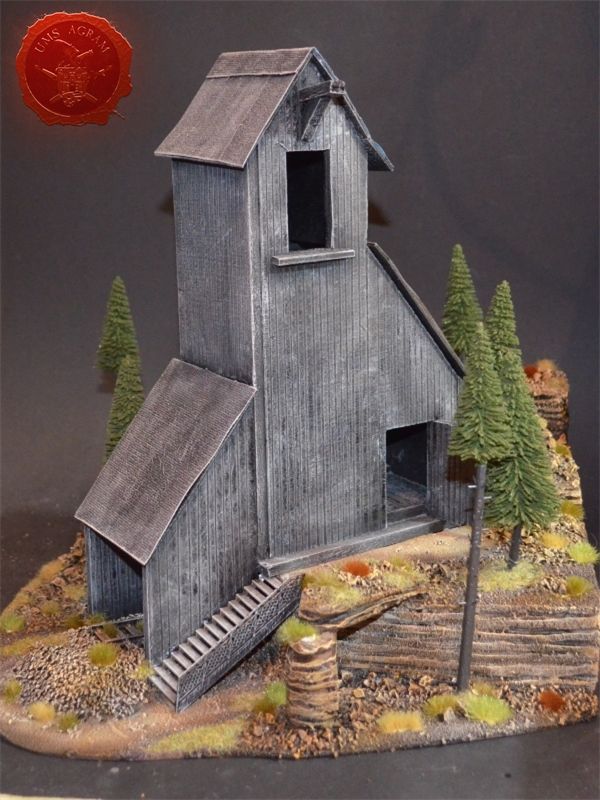
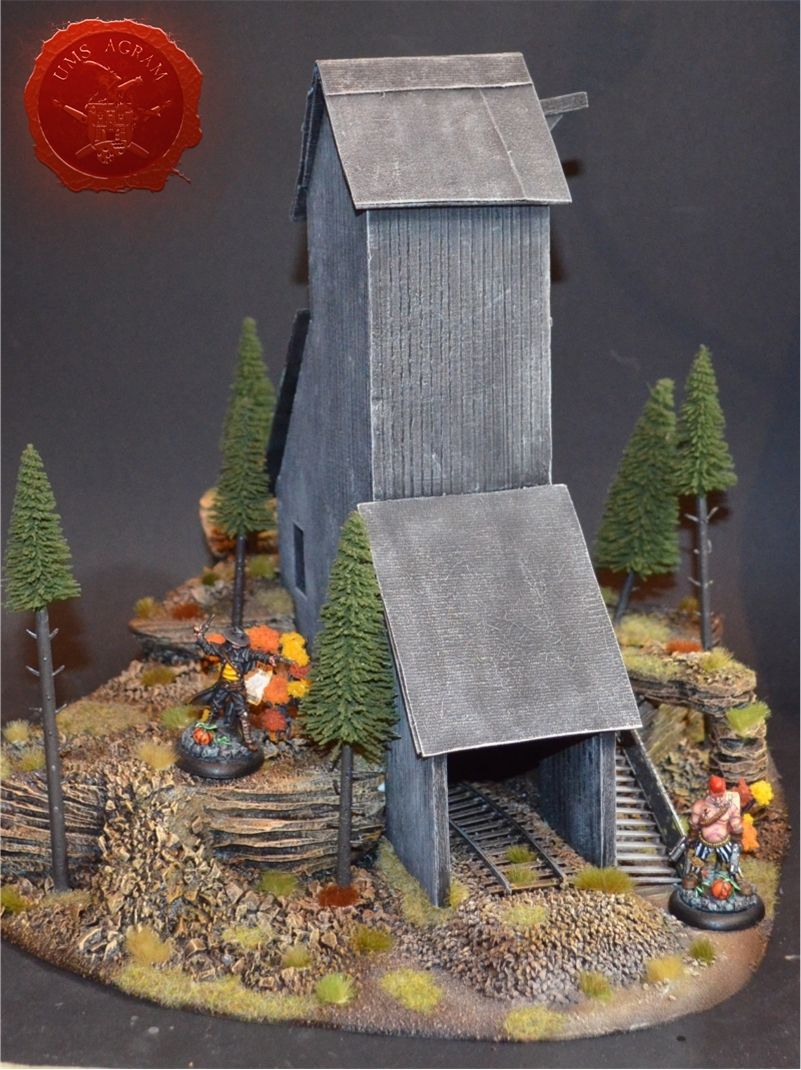
In the end I added a staircase I got in a NOCH train set in order to connect the entrance to the mine with the door of the house on the first level of styrofoam base. Finally, I added a couple of miniatures to test whether the dimensions I used work. And I was pretty happy with the end result.
Latest articles
- We attended: Isle of Wonders 2026 Ili Said, 6th July 2026
- We attended: 13. Trofeo San Giusto 2026. Marko Paunović, 6th July 2026
- We attended: Zagreb Scale Model Show 2026 Mario Grgurev, 6th July 2026
- Making of MUMMY dioramas Sebastian Søgård, 17th June 2026
- Miniature Painting Workshop - 75mm Dwarf Ivan Knezović, 26th May 2026


Latest battle-reports
- Kill Team - Blooded vs. Vespid Stingwings 28th February 2025, GW - Warhammer 40.000, and Antoni Pastuović (Imperial Guard)
- 22nd April 2022, GW - Warhammer 40.000, Borna Pleše (Space Marines) and Kristijan Kliska (Tau Empire)
- 17th November 2021, GW - Warhammer 40.000, and Nino Marasović (Space Marines)